Showing posts with label DIY. Show all posts

Tuesday, July 23, 2013

20 Minute Mini Porch Make-Over

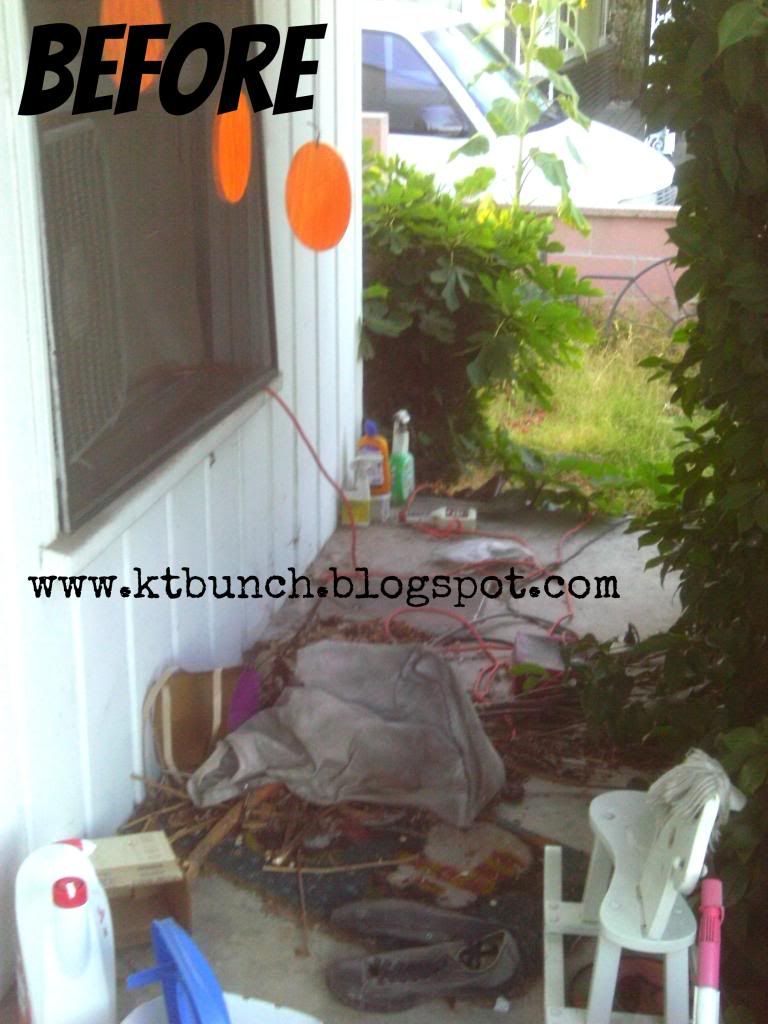
We've lived here for years and have never fully utilized our porch. The front of it is blocked by a large bush that is as tall as the roof. I'm thinking it was to block sound from the main street. Since no one could see the porch, because of the bush, we mainly used it for extra storage space, aka: junk.

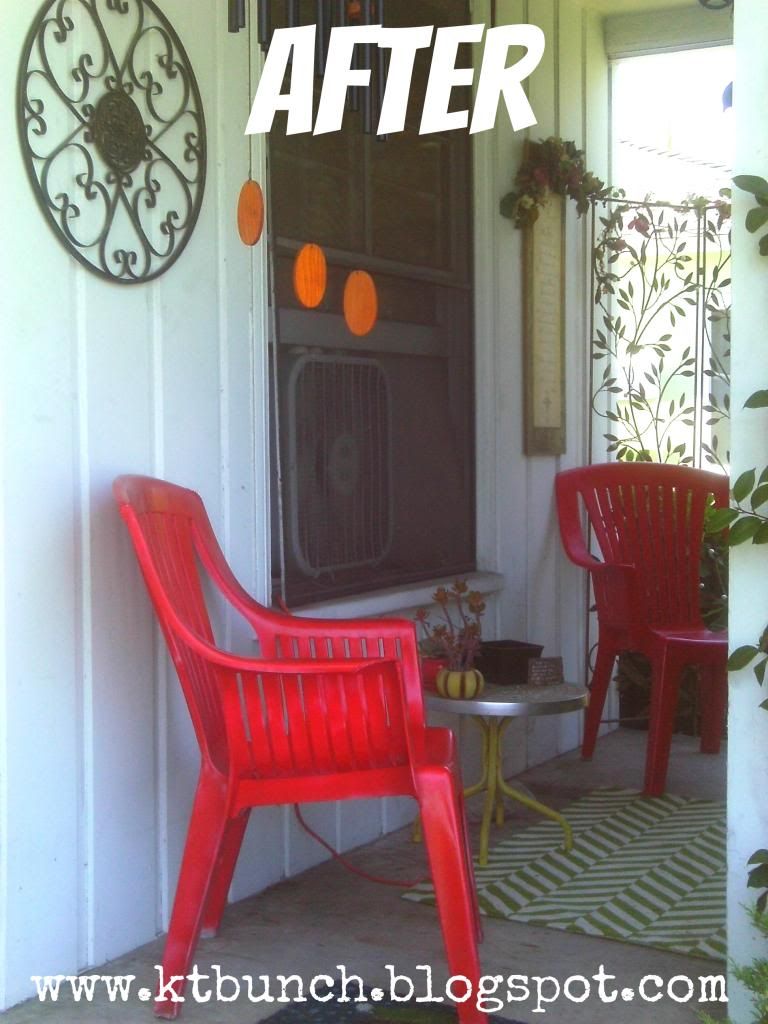
My sister-in-love was over the other day and the house was retaining the summer heat. We took two of my new-to-me-freshly-painted chairs, squeezed them onto the porch to enjoy the breeze. It hit me that I could create a cozy space using what I had on hand.

I cleared the junk and trimmed the bush back. I had a rug from Target that I got on clearance, moved a little table over, added twinkle lights and a room divider I had in my bedroom, hung a few wall items and candle sconces. Voila!


Monday, July 01, 2013

Inspired DIY Outdoor Shower

I saw the most romantic outdoor shower, the other day at Cost Plus World Market.  It was even on sale! I have no good reason to need much less want, an outdoor shower. We don't have a pool. We don't live near the woods or any secluded area...we live in suburbia for goodness sake.

I don't know why I think it's romantic--our back yard doesn't even have shade! For goodness sakes. I have to admit, and come to terms with the fact that I pretty much view everything through a highly romantic lens...like curved shower bars. {Don't knock it till you get one!}

My oldest son figured he could make one. The next day he and his friend did...

Here is the inspiration:


Sorry, if you want to see a better and more details pic of it, click on the link in my intro sentence. World Market is pretty good at making their larger pix uncopyable.

It has a brushed metal looking shower head and piping, petite, stained beams, an old fashioned handle, and even a handy soap dish!

It's just fabulous, isn't it?

They spent the afternoon gathering supplies and went to work to recreate it.


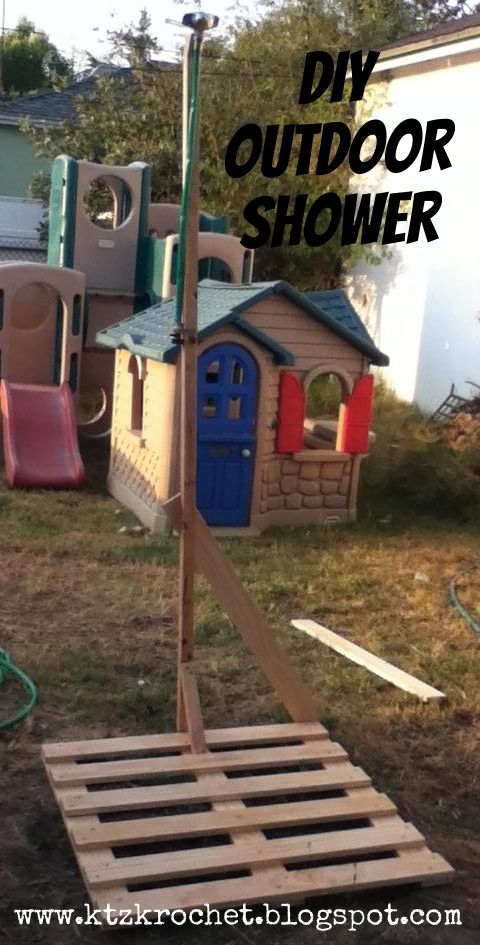
Here is their version:

Not the best staged picture or angle, either. But hey!

Instead of a shower head they used a sprinkler. Instead of pretty piping they used green rubber hose. Instead of petite wood beams,they used 2x4s. No soap dish.

It works though and it's pretty nifty. Now, I just need a reason to take an outdoor shower...I think the boys will get good use out of it when it's that time of day that all the heat is trapped inside our house and it feels 'too hot' to take a shower but that's exactly WHY know you need one.

Monday, May 28, 2012

Knock-Off Drape Dress


Garment Sewing Challenge: May 2012


I was searching for a dress for my graduation and this one at Target caught my eye. It was $24.99. The fabric was a nice and soft polyester. It didn't seem to be a very complicated style though...or so I thought. I was sure I could recreate it myself. I loved the knee-length and the no-cleavage-show neckline.

Here is the inspiration dress--from the dressing room in Target.

It's flattering, right?
How hard could it be...it just hangs there...

Initially, I went to work to find a pattern. Guess what? NO pattern. Trust me I searched the pattern books, online AND in person. I was going to have to go this *alone*.

I did find an online tutorial for a sleeveless maxi-dress that had a slight drape along the neck--but otherwise, it was nothing like this dress. I used that tutorial simply as a yardage reference. It recommended 1.5-2 yards of fabric.

I also wanted this deep magenta color. I headed to Joann Fabric's to see what I could find.

I purchased the closest thing to magenta they had and a green in the same--both fabrics were polyester, which is exactly what the original fabric was.

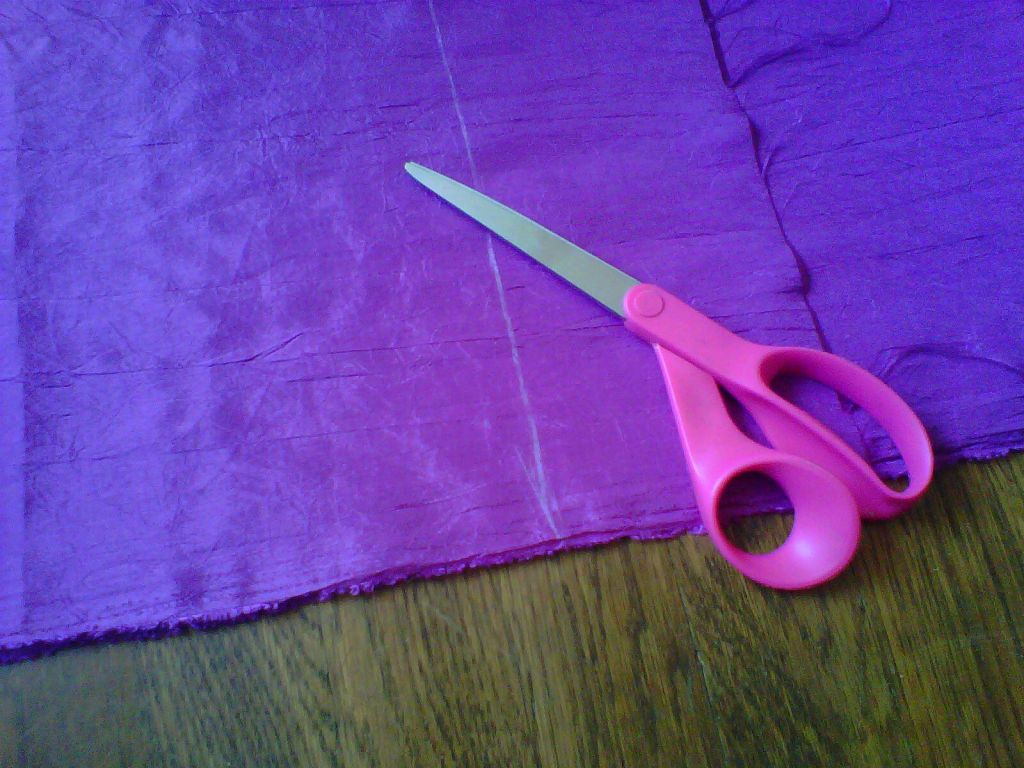
 Oh! I was SO afraid to actually CUT the fabric. I finally went back to Target & purchased the original dress so that I could take it's measurements and inspect it a little more closely. I purchased it in green so I would not be tempted to keep it.

I wrote down all the measurements and promptly returned it.


I finally built it, after fighting with the bobbin thread. The front was not as drapey and the sleeves were too short? I realized the front was supposed to be 48 in across and I had cut it to 36 in across. EEK! Ok...I cut two panels and added them to each front 'sleeve'. Ok..it could work.

I sewed an elastic waste. I used a circle of elastic I had in my stash--from a pair of underwear (I always salvage the elastics) one of the dogs had chewed! The waist ended up being a tad bit too high and the sleeves a bit uneven.


BUT otherwise, I LOVE it! I tied the sleeve edges together and you don't even know they are uneven!

TADA!!!!

It was a little breezy when I took this pic. Sorry.
I wore this dress to my graduation banquet.

Then I found another polyester fabric that had a different weave that was much closer to the fabric of the original dress...I knew I just HAD to use it for my actual graduation.

THIS is my entry for the sewing challenge!
The school colors are black & yellow. My DIY invitations -announcements  were black and white polka dots with a yellow ribbon accent. I knew I just HAD to get this fabric and accent it with yellow.

The sleeves came out much better since I paid better attention to the correct measurements the second time. haha.

This fabric draped much nicer. The neckline actually drapes lower than this picture implies.

I have two more fabrics to make two more dresses. I LOVE this style THAT much. (oh--so that makes 4 dresses for just a little more than the price of the ONE original dress after I purchased sale fabric & used a coupon! Kerching! Kerching!)

The hardest part was the shoulder seams. The front neckline is actually folded under and sewn to itself with the back neckline in between. It created some trickiness for sure.

What I love most about this style is the ability to dress it up with accessories and heels or dress it down with casual flip-flops and no belt. As far as building it-it's also VERY forgiving to create. The addition of a belt or ribboned waist hides any perceived flaws in the elastic waistline. It's also a flattering shape for the body because it is not clingy. It's comfortable and easy to move in because of the flow and loose style.

Except for the slight issue with the shoulders...the style isn't too hard to actually build. I didn't even hem either one of them. The pink (can that pass for magenta?) one I kept the selvage edge along the bottom so I wouldn't have to hem. The polka dot, I simply serged the bottom. When I make another one...I will probably serge the sleeves as well. (I did tiny hems on all the upper body edges)

Do you want to make one of these dresses now? I think you should. I'm thinking there are so many possibilities....ribbon tied shoulders? tank cut shoulders? etc.

Just keep picturing it as basic shapes: rectangle bottom and upside down triangle for the top. Voila'!
If you make one...be sure to share it w/ me cause I'd love to see it.

Linked to:


Visit My 1929 Charmer Blog!
Our Delightful Home

52 Mantels

Monday, March 26, 2012

Hey! I made a little book.


I've been fascinated by the idea of art journaling and altered books for years but have always been intimidated by it. I can't paint or draw and many of the lovely page spreads I've seen include both. Add to that, I can never figure out or decide what type of book to actually use.


I knew what I would really like to do is create my own book anyway. I finally found a great tutorial and made one, chunky, little book. I am so excited to make more. I also started an art journal but it's not finished yet so no pix for that.


It wasn't very hard at all. Supplies used were: index cards, card stock, scrap card board, scrap of ribbon and a glue gun. Voila'!

The cover was created using a very thick card stock, it was a little hard to crease and fold properly. next time I'll use regular card stock that isn't so thick. I also want to make a bigger one.

Check out this great tutorial to make your own hand made book!

Linking to:

DebbieDoos Newbie Party

Sunday's Best Linky Party!

Sunday, March 18, 2012

St. Patrick's day goodies


St. Patrick's Day gets barely a nod in our home but I did manage a few treats and goodies. I have been seeing folded paper medallions online and decided to make one for our front door. I gave it my own 'twist' by only creating a half medallion. I layered 3 different papers on top of each other, topped with a *clearance* sparkly shamrock.

It was quick and simple...once I found my glue gun. Never found the glue sticks so I hopped back into the car for the 2 minute drive down the street to Joann's to purchase a bag of glue sticks. I had my %40 off coupon handy so they only cost a few dollars.

Later, I melted vanilla and chocolate 'meltys' in my sister-in-love's microwave to dip pretzel sticks in for a yummy and simple treat. I used neon green food coloring in the vanilla and green sprinkles for a festive look. Nothing is yummier than a sweet and salty treat like a chocolate dipped pretzel! Right?

Dipped pretzels make a great treat gift for any occasion. All you hvae to do is coordinate your sprinkles for the occasion & voila'!

Saturday, December 10, 2011

Christmas Memorial Wreath

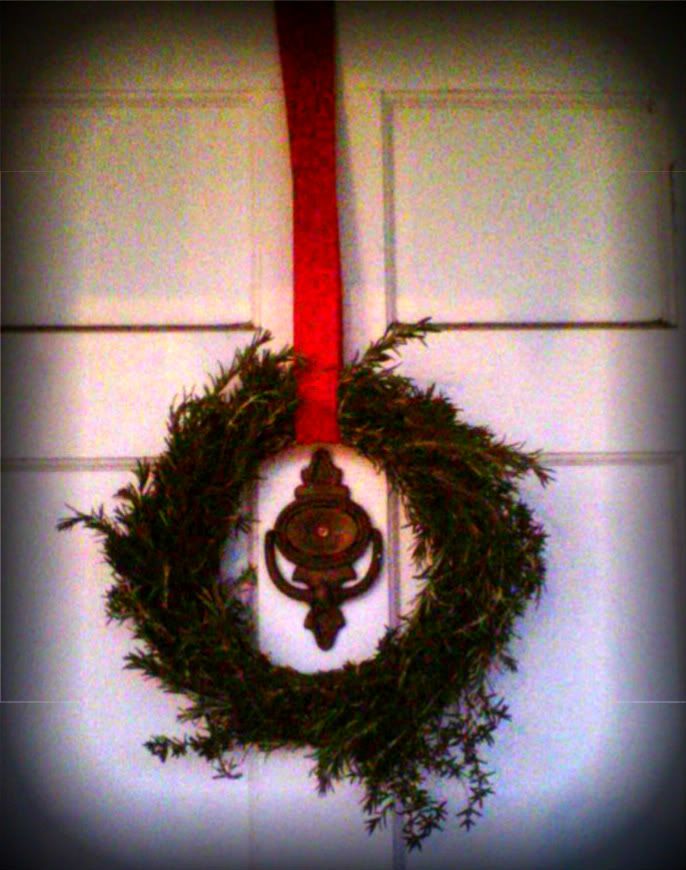
I wanted to make a rosemary wreath this year. I love the scent and the symbolism. Rosemary means remembrance. I thought it would be a nice way to remember those we miss so much during the holiday seasons. Plus I have three bushes of it growing in my garden. It also welcomes guests with a lovely fragrance when they enter through our doorway.
 
SUPPLIES:
wreath form
floral wire
rosemary
scissors (to cut wire)

I used two coupons I had for Joann's. The wreath form and floral wire were around $2 each full price but with my two coupons I was able to get each of them for about half price. I have lots of wire left over for another project too. That makes the cost of this wreath UNDER $2!

You could virtually make this project for *free* using a wire hanger (we never have any since the Mr. no longer needs to dry clean his clothes) bent into a circle wreath form and yarn, twine, fabric scraps, or twisty ties that you have around the house to attach the rosemary. Don't be afraid to try various herbs or plants. I have read that boxwood makes a great wreath...I might try that next because I have a large box wood bush in my back yard too.


1. Starting with the longest and most pliable pieces, I wired stems along the inner most ring of the wreath. Work the wire like thread, up and around the stems and wire.


2. Use other long and pliable pieces to wire stems along the outer most ring of the form. Over lap tips and ends.


3. Use the split or bushy stems to fill in the center of the ring. Over lap tips over ends, wiring as you go. This section is more of a challenge to work with the wire. I suggest using smaller lengths of wire at a time and twisty them off on the back. I actually flipped the wreath form over at this point in order to wire the pieces on through the back. Keep the form face down on top of the rosemary to help prevent moving. Once the pieces are initially secure on their ends, go back and wire them along their tips.

4. Fill in any spaces with shorter, straight pieces. I was able to work the small pieces into the wreath form with out having to add any more wire, but go ahead if you need to. It's amazing how the wire disappears!

When it's as full as you like-you're finished!


There is a very large rusty nail in our door that we could NOT remove, making the red ribbon hang askew. Oh well. 

I also used bits of wild rosemary, which does not grow in straight stems, to add a little more texture and fluff around it. 

I would also like mine to be fuller so I think next time I will purchase a larger wreath form. OH! The rosemary will dry...so I am going to attempt to keep it fresher longer by spritzing with water daily. Let me know if you have any other suggestions or ideas for that.

Now, whenever anyone enters my home, they are greeted with the intoxicating scent of rosemary. I LOVE it.

Linked to:
LoeLaLoep

Tuesday, November 01, 2011

Felt Halloween Candy Bag

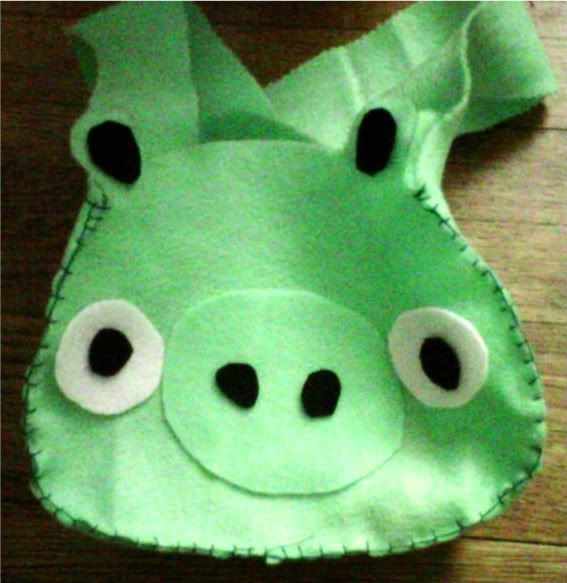
Although my kiddos each made their own individual costumes this year--I couldn't *not* have my hand in something! We dressed the toddler as an Angry Bird (based on a video game).  I figured I could @ least make his candy bag.


His trick-R-treat bag is a pig character from the game. (the birds are shot @ the pigs) I thought it turned out adorable and was very simple.

I hand sewed the primary bag pieces together. The rest of the facial pieces were hot-glued on in the name of time efficiency. I used green felt I had on hand and bits & pieces of black & white felt.

He was able to wear it messenger bag style--across his chest. ;-)

Felt is such a good choice for simple or beginner crafts. It doesn't fray when cut so it never needs seams or serging. It's also great for use with crafts for children as well a wide variety of other crafts like: felt flowers to be used as brooches or hair pins, hand or finger puppets, ornaments, book covers, baby shoes, holiday garlands, pin cushions or as an accent on an already made project. Just google felt crafts to find inspiration.
Tuesday, October 25, 2011

Big Brother T to lil brother T: make your own toddler T-shirt

The toddler needs clothes. Really. He has outgrown all but one pair of jeans. The temps have taken a dip so he also needs some long sleeved T's. I haven't gotten a chance to go to the thrift store and I really hate to spend money unnecessarily. In an instant I told oldest to see if he had a T-shirt he no longer wore, maybe was too small...I wanted to see if I could make the toddler a quick shirt.

It was ridiculously simple. Sorry for the poor pic quality--I always think to take pix too late. Here is a semi-tutorial for using larger T's to create a piece of toddler clothing.

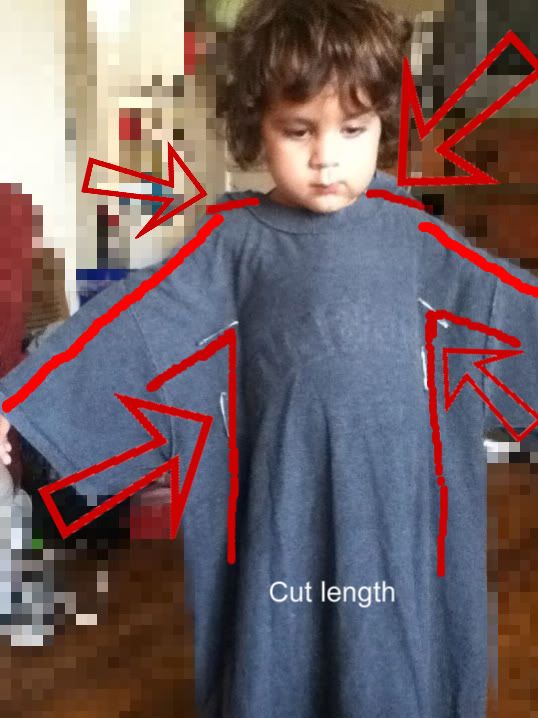
We put the T on him wrong side out so we could pin it to fit. We used LARGE safety pins. This avoids the risk of being poked. (Isn't this little guy such a patient little cutie?)

1. Pull up the shoulders first so you can pin it to avoid the the neck being too wide. Make sure it fits around the head easily to remove.

2. Have the toddler hold out his/her arms just long enough to get a good pin under. This will be where the 'sleeve' will begin.

3. Pin the sides along the waist for an appropriate fit.

4. Don't forget to mark the length you want.

5. I took my serger and eyeballed along the pinned edges. From under the arm to down the sides you are basically cutting or serging an upside down L shape on each side.

BE SURE to NOT serge or cut too close to the child's underarm OR they will not be able to comfortably remove or put on the shirt. Always better to be TOO BIG than too small...because you can always make it smaller but you can't make it bigger. IF you don't have a serger, you can simply sew a straight stitch along your lines/pins.

6. Serge (or cut & sew) the tops of the shoulders. Again pay attention NOT to make the sleeve too narrow. Line up the 'collar' so the edges are even.

7. After the underarm, sides & shoulders are cut and serged/sewn, serge the bottom or hem. I am blessed to have a serger so no hemming was required.

TaDaaaa!

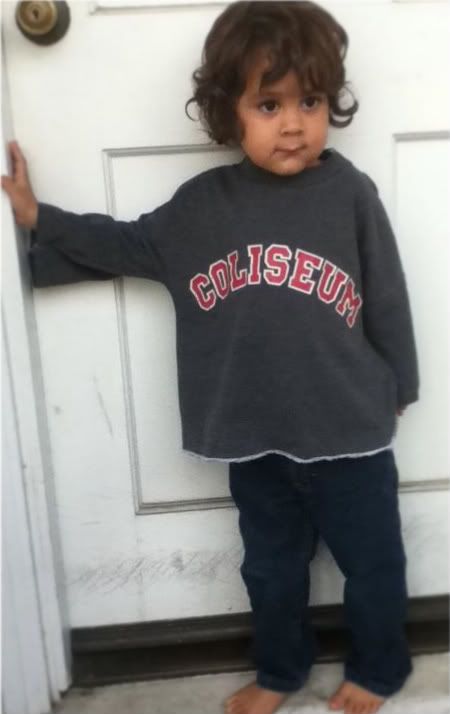
I couldn't be happier with how this turned out. It took all of 10 minutes? 

And the sleeve length was perfect! An adult size, short sleeve T produced a long sleeve toddler shirt. 

The shirt cut ended up being more of a roomy-boxy sweat shirt shape but you could also ways cut/sew it narrower along the abdomen if you wanted. I didn't mind how this turned out and I can't wait to create more.

I love when I can repurpose an item into something new. I know we have a bunch of T's around here and now I can put them to good use instead of tossing and/or buying new ones that this little guy will out grow in no time!

Don't you think this would make a great GIFT for new parents?....sneak one of daddy's old favorite T's & recreate it into a shirt the toddler can wear. You can also make little pants out of old T's as well. (have I posted that before? if not, I really should!)  I have a baby shower coming up soon...hhhmmm... ;-)

For a little girl's T, you could even flare the sleeves, which would be adorable. Don't you think? So many options--it's too easy NOT to try, isn't it? This would make a great first sewing or serging project. The toddler won't mind if you make a mistake and no one will even notice. Go ahead, try it today. I know you can do it. 


Seven Alive

Saturday, October 22, 2011

For the Garden

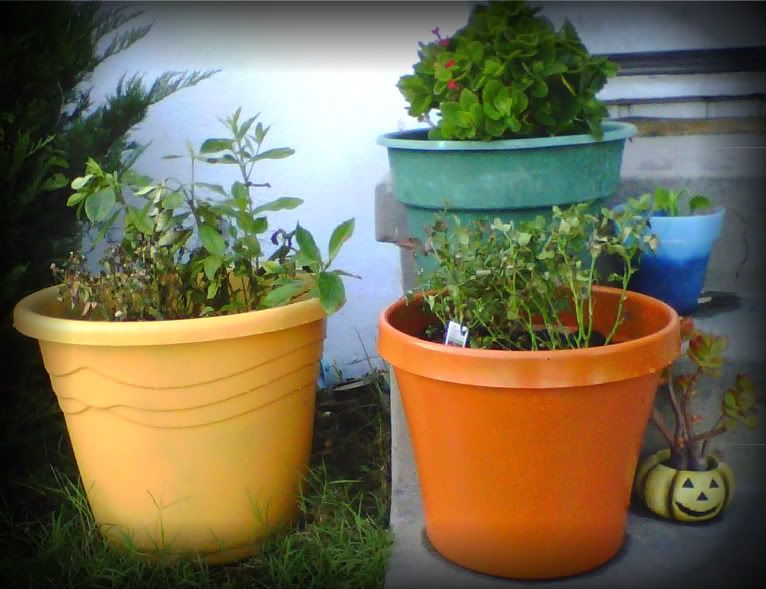
I've been working on my garden the past few months, not only adding plants but also trying to add visual interest. Being a renter, I've also tried to keep plants in pots so they are portable. A few of our pots were faded and pretty boring looking.

The other day I decided to spruce them up a bit with spray paint I had around the house. I bought it months ago for another project then changed my mind and they were never used. I decided to paint the larger one a golden yellow color and the smaller one a bright orange. The bright orange one's original color was a darker green so it ended up not being so bright, which was actually nicer. The colors go well for Fall but I think they will look good year round.

For now they are on the porch. The green one behind them could use some work, but it's harder to do while there is still a plant in it. The two we painted were empty.

My mini-roses aren't looking so hot right now. Not sure why. They were on the porch and looked lush and lovely, about to bloom again. Then suddenly a few days later they looked near death. 

The bigger yellow pot has a gardenia in it. It was looking neglected too but sprung back the next day after replanting it. Hopefully the roses will recover just as well.

Wednesday, October 12, 2011

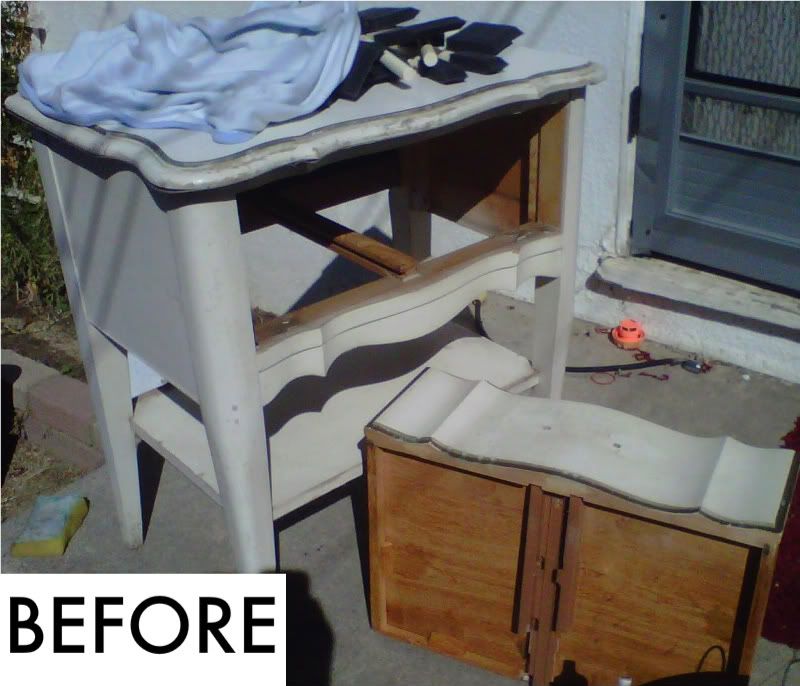
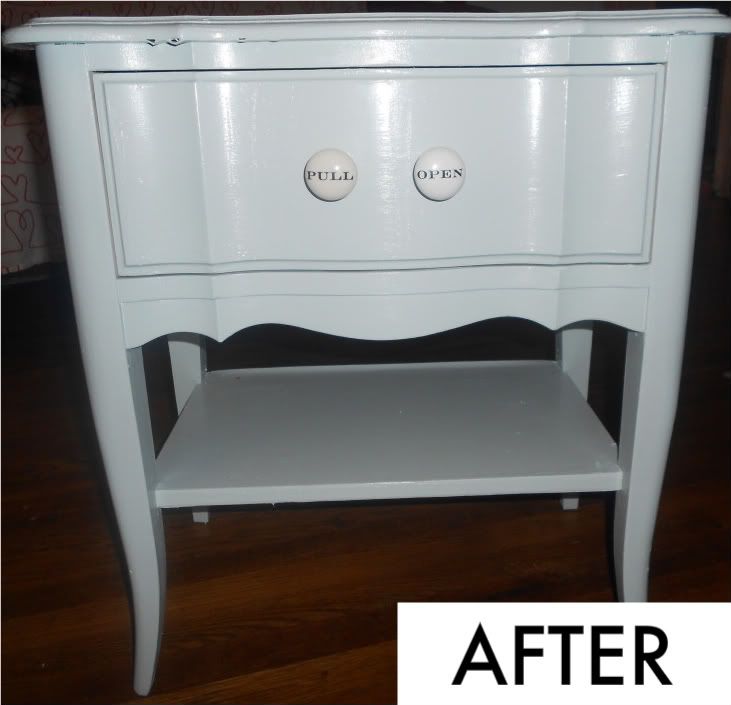
Bedroom Side Table re-do

I must've forced the Mr. to curb crawl this side table months ago if not last year. It took residence on our porch, sadly calling out to me every time I went in or out of my front door. I planned to get to it as soon as I could.

Same old story, right? Well, this weekend I was in a creative frenzy. I finally dragged-ok had oldest carry-that heavy little table to the back yard and the Birdy girl & I got to work.

I used primer, since I wasn't going to do any sanding, I already had on hand and some grey-blue oops paint I had also scored months ago.
We painted Birdy's room white this summer and have slowly been decorating it a neutral white on white since the male toddler is also housed there. Birdy also has this idea that she wants her room *vintage*. Well, this side table certainly fits that description.

It's not a new piece, but it definitely has much more life in it now!

It was the perfect day to paint it too, warm and dry. Almost too warm. The coats dried quickly so we were able to complete the entire piece in one afternoon.

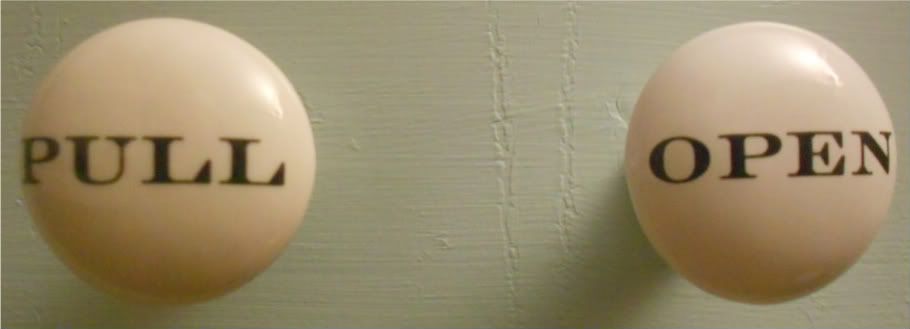
I found the drawer pulls at Michael's Arts & Crafts store for only $1.50 each. Initially, I purchased them thinking I could use them for my own desk that doesn't have any, but the screws were too big. They fit the drawer in this table perfectly!


Aren't they just adorable? I thought so too.


Wednesday, August 24, 2011

New Lighting Fixture


After repainting my daughter's room this summer, marshmallow white, I decided to go with this idea of white on white for decorating. It's a slow process but we're getting there. I saw some pictures of creating focal points with paper lanterns and I knew it was exactly what I wanted in her room for the lighting.

I realize now I should have taken a pic of the lighting fixture that was there before. (I might have one in the painting pix, if so, I'll post them later) It was a vintage, pink, glass bowl-like dish that hung down below the light bulb. I found these paper lanterns for very inexpensive and finally went to work.  

I also found large plastic crystal-chandelier like beads that I had planned on hanging intermingled with the lanterns but once we had the lanterns finangled, they seemed well enough with out them. Well, plus it was pretty tough on the arms and shoulders. There are beads hanging around the light bulb but they are too close to the lanterns to even see. bummer. (that's what those white strings are around the top of the light) They were a good idea in theory but gave us the most grief in application.

The whole thing was put together using upholstery thread. (just because that is the only white thread I had & I couldn't find my *invisible thread) The thread doesn't show on the lanterns but you can clearly see it attached to the beads. I attached the thread randomly to the wires of the lanterns and just kept pulling & tying until they hung in the shape and length we wanted. (oldest son was helping me) The beads are threaded onto a wire, wrapped around the metal fixture. I applied a strip of hot glue around the fixture to help it not slip. (learned the hard way after it slipped numerous times, entangling the beads) I tried tos tick to using what I had on hand.

I also realize the actual metal fixture the light bulb is affixed to, would look much better if *it* were also painted white. Don't know WHY I didn't think of that when we painted the room. 

I'm still debating whether or not to add beads but it looks nice and simple the way it is. The shape came out lovely. I can imagine having this in various shades, colors & textures would also be smashing. It creates a nice glow when the light is on too.

I'm thinking of adding more paper lanterns around the house...


Tuesday, August 23, 2011

Another Birthday Banner

Any excuse to sew? Instead of using glue to attach pieces of this super easy banner, I sewed them.

It was the Mr.'s birthday and besides the fact that he was always present (I like to surprise), I hardly had a moment to spare. So while he was out playing tennis for the morning, I went to work.

I free hand cut larger pennant triangles from fall themed paper I had, then smaller ones.  I sewed straight across the tops to attach the smaller pieces on top and to attach each pennant to the next. I left my free motion quilting foot on my machine all summer, this was another excuse to put it to practice. (And boy do I need practice using it!!!!) After all the triangles were attached, I created a string of swirls on each individual pennant. I had plenty of letters but none that went with the color scheme of the papers. I noticed some letters the day before while I was @ Target & knew they would match. I quickly went to Target, used a $5 gift card I had and paid a dollar out of pocket for a pack of alphabet stickers in the exact hues I needed.  Voila'!


Easy peasy and festive to boot!

Saturday, July 30, 2011

Water Bombs

I haven't been doing as much crafting this summer as I thought I was going to. Most recently I've been using my creative energy to over haul my home, one donation bag at a time. Getting rid of *stuff* is a major ordeal. Seriously. This led to over hauling one of the kids rooms....which led to a search for smaller beds to make their living space more spacious. They had a giant bunk bed that took up a lot of eye-room as well as much of their bed room. It had a full size bed on the bottom, which can accommodate lots of kiddos when needed but beyond that....that led me to scour craigslist for new beds. I found exactly what I was looking for, for a steal! Praise the Lord.

Once we took the old bed down and brought the new beds in....we could see how horrible the walls were. Peeling, cracked paint caused by mold *in* the walls...the paint would chip off & there would be mold *under* the paint. ugh. ugh. ugh. So that led to repainting the entire bedroom. A full day project, assisted by my fabulous sister-in-love. Thank goodness for her. 

The room is now a gorgeous, bright *white* called 'marshmallow'. ALL of that though...took a lot of my creative energy to accomplish. We're still not totally finished because now we get to use some creative energy to decorate the room in a fresh color scheme using bright accents.

Plus we've been having a fabulously active summer. I take yarn and hooks with me everywhere I go but I'm intentionally staying focused, enjoying the present moments to much to let time pass me by.

I did do a quick and easy project the other day though. Water Bombs!  I followed the simple idea in this post and produced these:

Yep! I'm totally awesome, I know. The pack of colorful sponges were from Dollar Tree, yah for $1! I also purchased a pack of zip ties from Pep Boys from around $3 and have a ton left over. (like 95! lol) It can't get much cheaper than that, can it?

Monday, June 27, 2011

Baby Shower gifts!


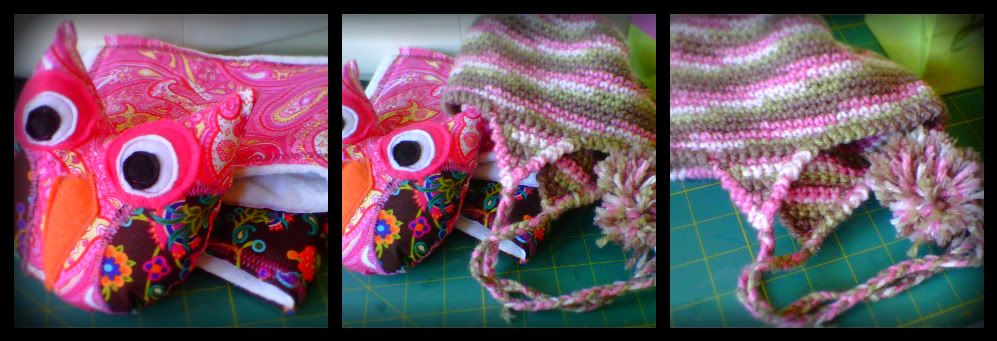
I attended a baby shower on Sunday afternoon for a long-time friend, she's expecting a girl after two boys. I knew I wanted to give a home made gift but I had not been on the ball @ all. I whipped together one of my owl but in miniature size. It came out adorable AND was super fast to make....it took my standard time of 'about an hour' from start to finish.  But what else?

My wheels of creativity started turning over night so that morning I whipped out a couple burp cloths in coordinating fabric, dug through my stash of crocheted items and grabbed a hat that was cute but had been too small for Birdy when I made it, found a small, cute canning jar & filled it w/ some home made detergent and put a piece of coordinating fabric over the lid. Voila'! Instant gift package. Then I wrote a blessing on my card to her. Bummed that I forgot to take a pic of the jar of detergent.

I was pleased how it all worked out! Everything looked adorable & she loved it. I dug through my stash of cloth diapers and was able to find 2 that I had purchased specifically for that purpose but never made. Then I lucked out to actually find a lid that fit the canning jar on the first try too! ;-) I already had all the supplies on hand and didn't need to spend any money.

I am also hoping to whip out a pair of crochet Mary Janes for her little bebita....because admit it, it's not every day you have the opportunity to crochet a sweet little pair of Mary Janes! ;-)

Saturday, March 05, 2011

We love color

Part of our Valentine gift giving included making heart shaped crayons.  I grabbed a few chocolate molds I've had in the garage *forever* & have never used. (not the best choice!) It sounded like a great idea at the time.


I placed the mold upon my stone cookie sheet, on a low temperature setting and baked until it all looked melted enough.  I'll spare you the photos showing the melted crayon spilling beyond the molds it was meant to stay IN.


I placed the mold in the freezer for a few minutes...or until I remembered.  They popped out easily once I took them out. By the third set (which I forgot to take a pic of) I used my silicone, heart shaped, mini-muffin pan (is it a pan?). NO risk of being in the oven--but I don't think I'll ever be able to use it for food again--so it's a risky trade off.

For future reference, I think using a candy mold is  a great idea if it isn't going in the oven.  Mine survived but I watched them very closely, but they seemed to warp a bit when they got warm. However, if it was middle of summer, I think you could put the crayons in the molds and simply set them in the sun and have beautifully shaped crayons in no time without risking the integrity of the mold.

Tuesday, May 19, 2009

Doll Case

I love old suitcases. Always have.  This one was in great condition inside too.  I have this dream of my dd having all these lovely suitcases to hold all her dolls and doll accessories in. When I saw this one, originally a dull brown color, @ the thrift store--I *knew* I just *had* to have it!  Plus I had recently been inspired by all these decoupage suitcases I saw online somewhere.

I used spray paint, taped the edges....which took FOREVA!....I did not have much tape so I fudged and some paint ended up getting under the newspaper I was using to mask it--it was windy, what can I say?  I used bright pink and a light pink.  The light pink looks white compared to the bright pink.

Over all though, it's cute and turned out nicer than it started.  It's roomy enough to hold almost everything too. ;-)