Showing posts with label easy. Show all posts

Thursday, September 13, 2012

Prophetic Art Journal Page

A few months ago I finally started a project I've been wanting to do for awhile. It's an art journal. It combines basic journaling with more artistic flair...from what I can tell.

I've also been using a technique often referred to as an 'altered book' because I took an actual hard back book and used the pages for my own purposes. My book is a combination scrapbook, journal, and inspirational quotes and verses. So basically everything and anything, whatever I feel like at the time.

My children can draw but that is one artistic endeavor I seem to have no skill in, so I never attempt it. However, I can do simple shapes. The other day I had a vision, a divine inspiration in the form of  a picture in my head. I decided to attempt the picture into my book. I like how it came out...but now I want to add a couple verses to the page...

(forgive me, I do not have a 'real' camera that works so I am limited to my camera phone! :-( 
If I make the images any bigger they are horribly blurry)
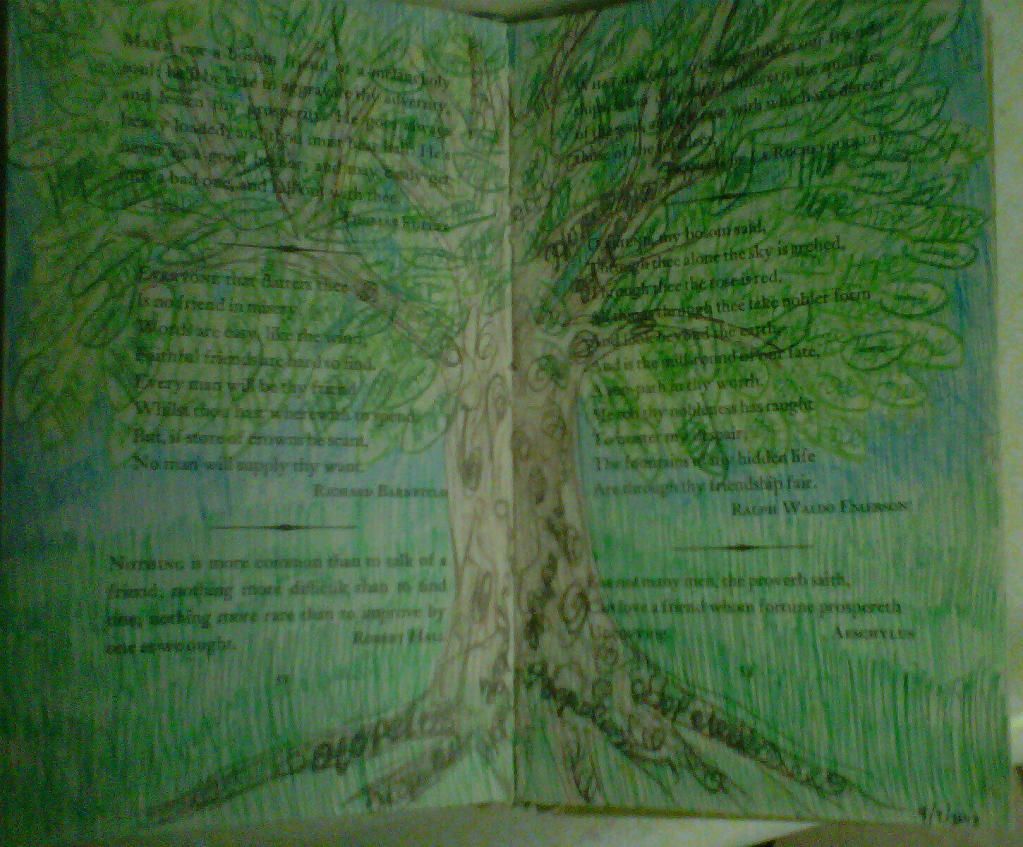

It's a sketch of a tree.  
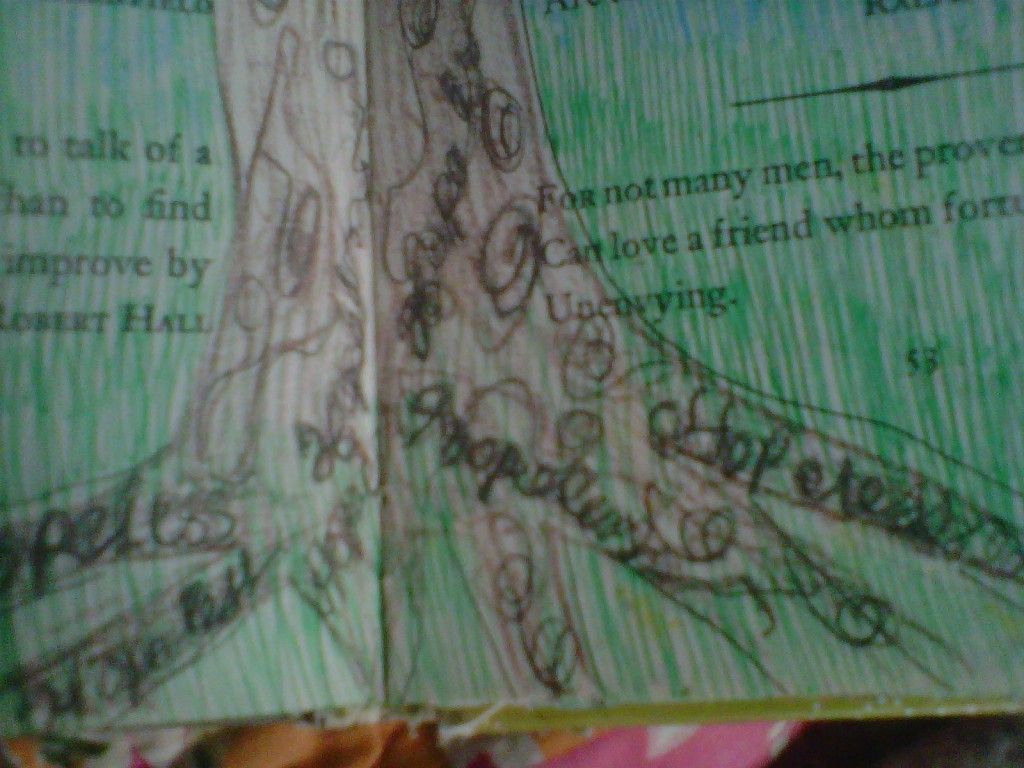

The roots of the tree have the words HOPELESS in them. 
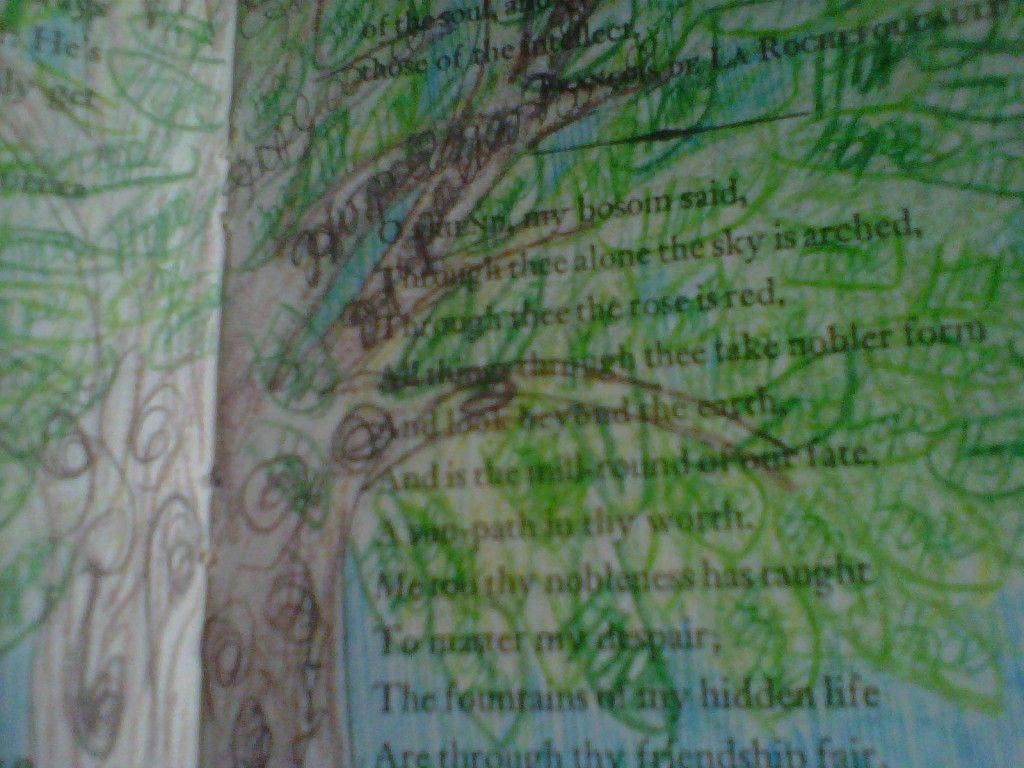

Whether you can see it or not, ALL the leaves have the word HOPE written in them.

I have since learned there are two verses that refer to 'healing leaves'.

Rev 22:1 Then the angel showed me the river of the water of life, as clear as crystal, flowing from the throne of God and of the Lamb 2 down the middle of the great street of the city. On each side of the river stood the tree of life, bearing twelve crops of fruit, yielding its fruit every month. And the leaves of the tree are for the healing of the nations.

Eze 47:12 Fruit trees of all kinds will grow on both banks of the river. Their leaves will not wither, nor will their fruit fail. Every month they will bear, because the water from the sanctuary flows to them. Their fruit will serve for food and their leaves for healing."

I did not even realize these verses existed. One night after our family prayer and worship time I asked one of my sons, "What is God telling you right now?"
"Let the leaves awaken to speak."
"What?" Did I hear that right?
"I don't know, that's just what He said."
"I know but what was it you said?"
He repeated himself and I knew immediately it related to the picture-he knew nothing about it. I showed him and felt pretty excited about it. The next day I unexpectantly met with a friend to pray. She happened to reference the Revelation verse quoted above with out me even mentioning my picture. I was excited to show her and tell her what my son had said.

God works like that, putting all the puzzle pieces together. He speaks to us in images, words, thoughts, ideas...through any and everything. This was extra fun for me because I rarely draw...my children are always drawing prophetic pictures at church. So this was a new experience for me.

I really enjoy the art journaling because it allows me to create a page and fulfill my urge to create, rather quickly and easily. I mostly use layered papers and stickers to create a page I can write on. I also have verses.

I will add more posts with pix of other pages, later.

Sunday, March 18, 2012

St. Patrick's day goodies


St. Patrick's Day gets barely a nod in our home but I did manage a few treats and goodies. I have been seeing folded paper medallions online and decided to make one for our front door. I gave it my own 'twist' by only creating a half medallion. I layered 3 different papers on top of each other, topped with a *clearance* sparkly shamrock.

It was quick and simple...once I found my glue gun. Never found the glue sticks so I hopped back into the car for the 2 minute drive down the street to Joann's to purchase a bag of glue sticks. I had my %40 off coupon handy so they only cost a few dollars.

Later, I melted vanilla and chocolate 'meltys' in my sister-in-love's microwave to dip pretzel sticks in for a yummy and simple treat. I used neon green food coloring in the vanilla and green sprinkles for a festive look. Nothing is yummier than a sweet and salty treat like a chocolate dipped pretzel! Right?

Dipped pretzels make a great treat gift for any occasion. All you hvae to do is coordinate your sprinkles for the occasion & voila'!

Sunday, January 22, 2012

Save those pants!


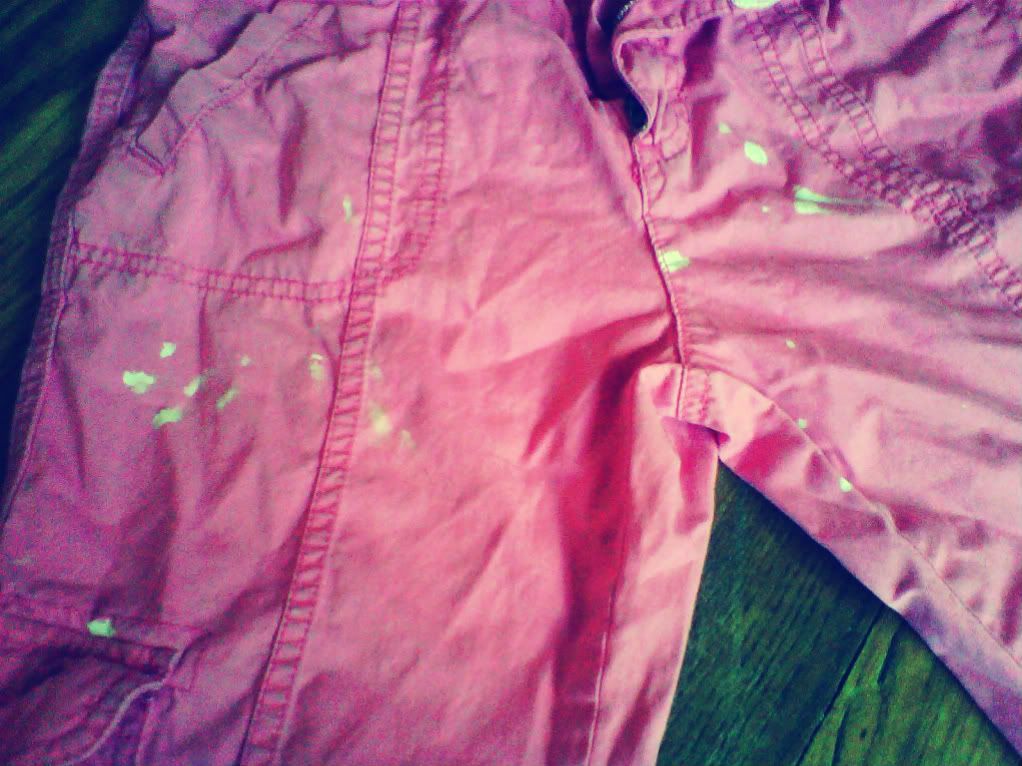
We rarely have much less use bleach in our home. However, of course the ONE time we do---the Birdy Girl mysteriously got bleach spots on a pair of her pants. They fit her well and had lots of life left int hem, so I hated to have to get rid of them.

After seeing a few pots in blog land about 'art' they made with bleach pens....I splurged and purchased one. I knew that was the answer.


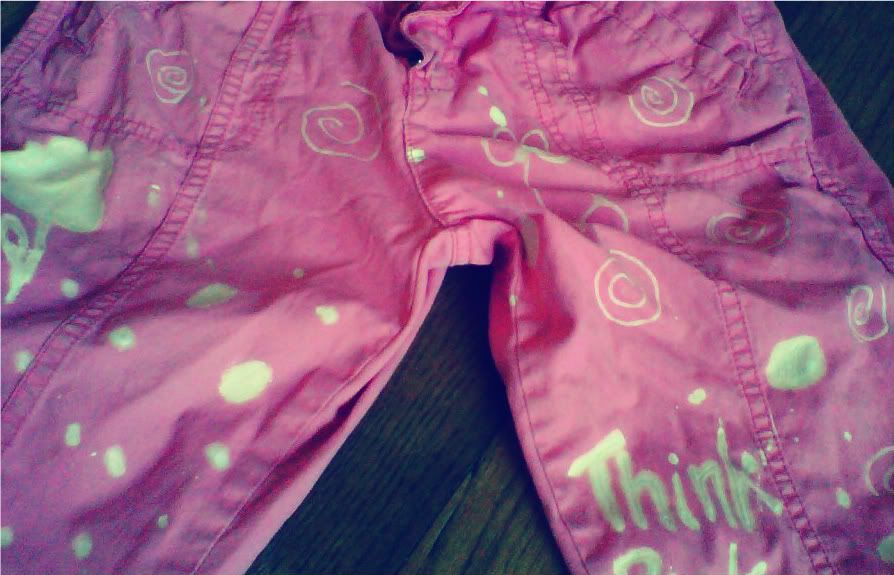
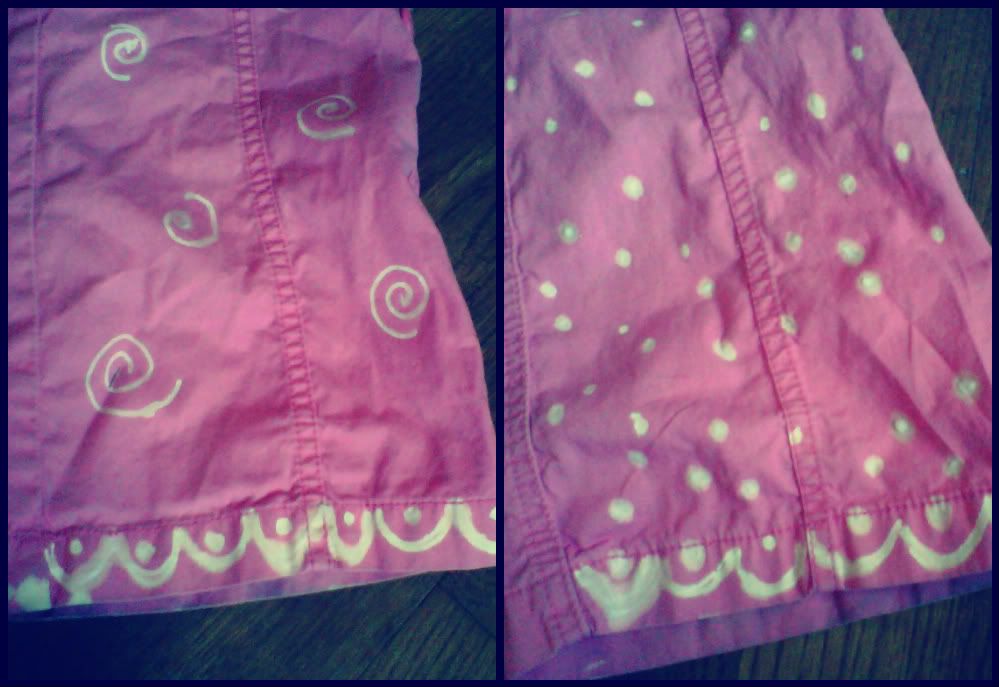
We went to town creating dots and flowers and eventually swirls on her pants to cover up the original spots. It took some getting used too but by the end we were nearly pros. haha.


The 'pen' has two ends, a fine point and a thicker point. The fine point was used for the swirls and the thicker end worked well for the larger polka-dots. Occasionally, the liquid would come out fast and thick so you really should practice on scrap fabric to get the hang of it. We didn't care too much since these pants were already *ruined*, we had nothing to lose. The girl loves how they turned out and now she has extra life in her pants as well a fun 'new' pair.

Saturday, December 10, 2011

Christmas Memorial Wreath

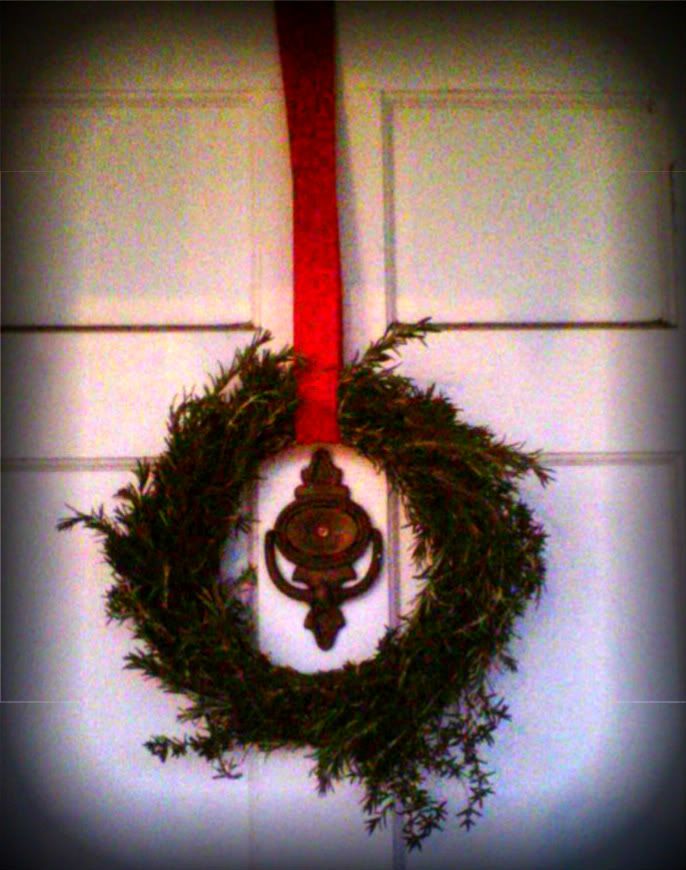
I wanted to make a rosemary wreath this year. I love the scent and the symbolism. Rosemary means remembrance. I thought it would be a nice way to remember those we miss so much during the holiday seasons. Plus I have three bushes of it growing in my garden. It also welcomes guests with a lovely fragrance when they enter through our doorway.
 
SUPPLIES:
wreath form
floral wire
rosemary
scissors (to cut wire)

I used two coupons I had for Joann's. The wreath form and floral wire were around $2 each full price but with my two coupons I was able to get each of them for about half price. I have lots of wire left over for another project too. That makes the cost of this wreath UNDER $2!

You could virtually make this project for *free* using a wire hanger (we never have any since the Mr. no longer needs to dry clean his clothes) bent into a circle wreath form and yarn, twine, fabric scraps, or twisty ties that you have around the house to attach the rosemary. Don't be afraid to try various herbs or plants. I have read that boxwood makes a great wreath...I might try that next because I have a large box wood bush in my back yard too.


1. Starting with the longest and most pliable pieces, I wired stems along the inner most ring of the wreath. Work the wire like thread, up and around the stems and wire.


2. Use other long and pliable pieces to wire stems along the outer most ring of the form. Over lap tips and ends.


3. Use the split or bushy stems to fill in the center of the ring. Over lap tips over ends, wiring as you go. This section is more of a challenge to work with the wire. I suggest using smaller lengths of wire at a time and twisty them off on the back. I actually flipped the wreath form over at this point in order to wire the pieces on through the back. Keep the form face down on top of the rosemary to help prevent moving. Once the pieces are initially secure on their ends, go back and wire them along their tips.

4. Fill in any spaces with shorter, straight pieces. I was able to work the small pieces into the wreath form with out having to add any more wire, but go ahead if you need to. It's amazing how the wire disappears!

When it's as full as you like-you're finished!


There is a very large rusty nail in our door that we could NOT remove, making the red ribbon hang askew. Oh well. 

I also used bits of wild rosemary, which does not grow in straight stems, to add a little more texture and fluff around it. 

I would also like mine to be fuller so I think next time I will purchase a larger wreath form. OH! The rosemary will dry...so I am going to attempt to keep it fresher longer by spritzing with water daily. Let me know if you have any other suggestions or ideas for that.

Now, whenever anyone enters my home, they are greeted with the intoxicating scent of rosemary. I LOVE it.

Linked to:
LoeLaLoep

Sunday, November 06, 2011

Baby Book

Another baby shower, another baby gift. I had a root canal on Friday--& it was much more traumatic (ie: *painful*) than I expected. I had planned on creating my gift on Friday but just couldn't. I was pressed for time on Saturday, the day of the shower, and needed to change plans slightly.

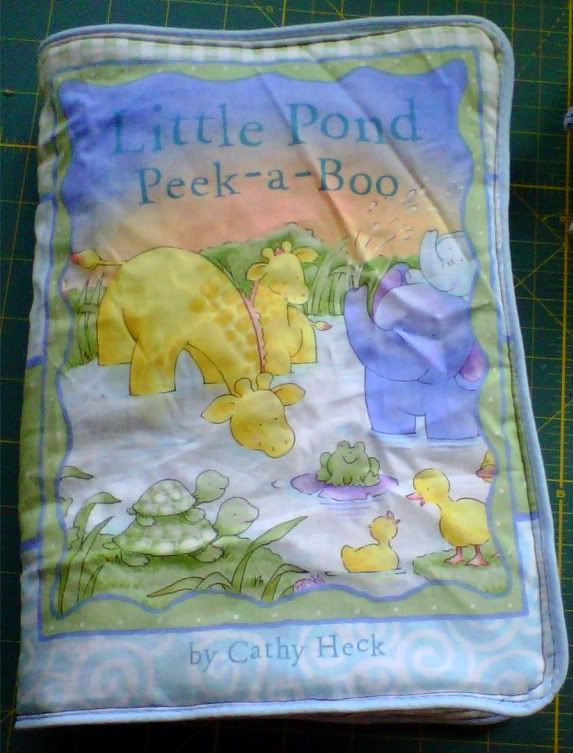
I made this cloth book. It was plan B, admittedly. It is an easy go to & makes the perfect gift for a little one. A baby can chew on it, spit up on it, drag it around...Hey! It can even double as a burp cloth over your shoulder--just flip the page each time. haha.

Then just toss in the wash!

Cloth books make great beginner sewing projects & the recipient will *always* love them & won't even notice any mistakes.

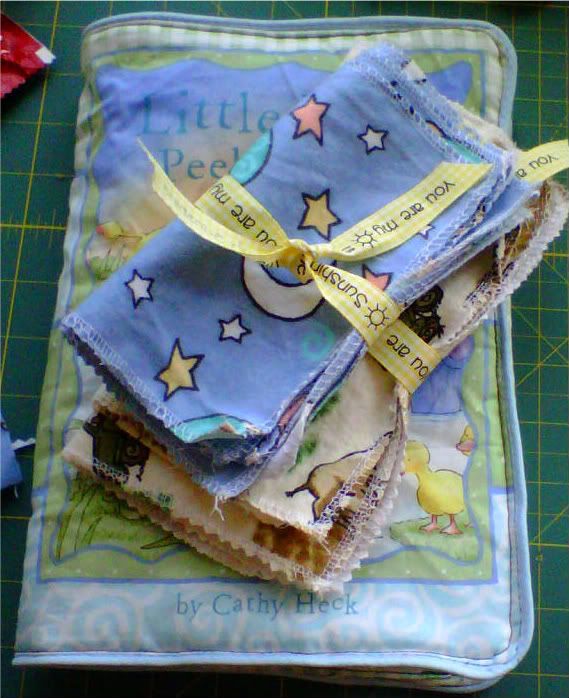
Since I was unable to go with my original gift idea, I also added home made baby wipes/wash cloths.  Another simple 'go-to'. 


I cut squares of flannel I had on hand and serged all around the edges. Voila'!

Soft, economical AND eco-friendly + an easy way to stash-bust. 

I wrapped everything in a sweet bow and placed in a brown paper gift bag. Birdy cut out & then glued on extra fabric motifs from the cloth book to the sides of the bag.

The recipient loved it.
And her shower was absolutely lovely!
The table centerpieces were gallon sized succulents wrapped in brown paper & twine. Each guest received a small succulent plant wrapped the same way. So sweet. The best looking gender-nuetral shower I've ever seen. (the parents to be have chosen to keep baby's gender a secret--even to themselves-how exciting!)

Tuesday, November 01, 2011

Felt Halloween Candy Bag

Although my kiddos each made their own individual costumes this year--I couldn't *not* have my hand in something! We dressed the toddler as an Angry Bird (based on a video game).  I figured I could @ least make his candy bag.


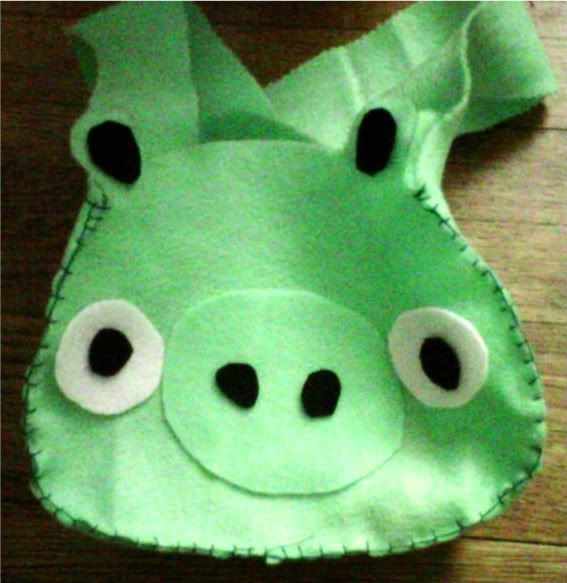
His trick-R-treat bag is a pig character from the game. (the birds are shot @ the pigs) I thought it turned out adorable and was very simple.

I hand sewed the primary bag pieces together. The rest of the facial pieces were hot-glued on in the name of time efficiency. I used green felt I had on hand and bits & pieces of black & white felt.

He was able to wear it messenger bag style--across his chest. ;-)

Felt is such a good choice for simple or beginner crafts. It doesn't fray when cut so it never needs seams or serging. It's also great for use with crafts for children as well a wide variety of other crafts like: felt flowers to be used as brooches or hair pins, hand or finger puppets, ornaments, book covers, baby shoes, holiday garlands, pin cushions or as an accent on an already made project. Just google felt crafts to find inspiration.

Wednesday, October 26, 2011

I don't have TIME to sew...and other creative myths #1.

The idea of working on a a project, can be more over whelming than the project itself. I'm a busy wife and mom but I make time to create. It feeds my soul in numerous ways and if I neglect my creative side for too long I has a negative impact on my psyche. Really. I truly believe creativity is good for one's mental and emotional state and probably even spiritual state.

I want to enlighten you to many of the myths we tell ourselves to hold back those creative forces and offer you the truth...or at least some creative solutions to the obstacles that hold us back. This series will focus on one myth per post and offer some tips and tricks to help over come the creative myth.


Creative Myth #1

I don't have time to sew!

Break it down into bite size creative chunks: Any project can be broken down in to smaller time increments. For example, cut your fabric pieces one day and put it away. The next day sew parts of it together. The day after that, do the hem. etc. You get the idea. Fight the feeling that you *must* complete a project in one sitting.

Learn short cuts: if you're making a clothing item for around the house, let's say for a child, it does not need to be perfect. Especially play or lounge clothes! The children won't notice or care. They don't need French Seams or that every seam be serged. Of course you want it to last until they out grow it, but that usually happens sooner rather than later. Pinking shears (the scissors that cut in a zig-zag pattern) are very useful to help prevent fabric from fraying. Save the attention to detail for special occasions.

Ditch the pattern: patterns are great tools for learning to sew new items. They are not always necessary though.  You can find lots of free tutorials online these days that instruct how to create various sewn object using pictures and instructions. Using patterns unnecessarily uses up valuable time. 

For example:Do you really need a pattern to create a skirt? Guess what? NO! A basic skirt is a tube of fabric! Get it? Cut a large strip, sew up the side and fold down the top, sew leaving a small opening. Insert elastic OR even better a ribbon you can tie to fit you perfectly. If you are an *absolute* beginner and have *never* sewn anything before, then look online for how-to's to fill in the fine details.

You can use clothing you already have as a sizing guide instead of purchasing a pattern and taking time to figure it out and cut out the pieces.

Leave your machine out: I know, you're worried about what type of example you'll be setting for your kids if you don't put away your supplies *as soon as you finish*, right? Well, you are NOT finished! It can be tedious to have to unpack your sewing machine each and every time, just to have to immediately repack it away because the baby woke up unexpectedly or the 8 year old needs help with their spelling words or you smell the brownies you forgot about, burning--you get the idea.

Leave it out! If you are using your dining table to sew, then store it under the table where you can easily access it tomorrow. When you have only 10 or 20 minutes, you need to conserve those seconds when you can! You can put away the machine when you are expecting company. ;-)

What you can do with ONLY 20 minutes:
cut fabric pieces
sew a dress
sew a hem
sew a casing for skirt or child pants
attach two legs for a pair or lounge pants
cut fabric for an owl pillow
cut squares for a quilt
pin a 'quilt sandwich'
measure your child's waist and legs for width & length of pants (don't forget to write it down)
Find an item of clothing in the closet that fits well, to use as a sizing guide.
gather a ruffle or a skirt

You get the idea. Once you get started and have everything in perspective, you will be amazed how much you CAN get accomplished in very little time at all.

Hey! Go set up your machine and get started before the brownies burn. ;-)

Tuesday, October 25, 2011

Big Brother T to lil brother T: make your own toddler T-shirt

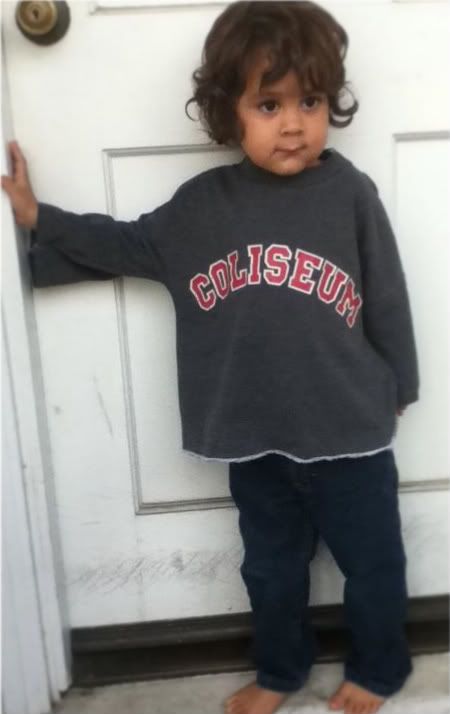
The toddler needs clothes. Really. He has outgrown all but one pair of jeans. The temps have taken a dip so he also needs some long sleeved T's. I haven't gotten a chance to go to the thrift store and I really hate to spend money unnecessarily. In an instant I told oldest to see if he had a T-shirt he no longer wore, maybe was too small...I wanted to see if I could make the toddler a quick shirt.

It was ridiculously simple. Sorry for the poor pic quality--I always think to take pix too late. Here is a semi-tutorial for using larger T's to create a piece of toddler clothing.

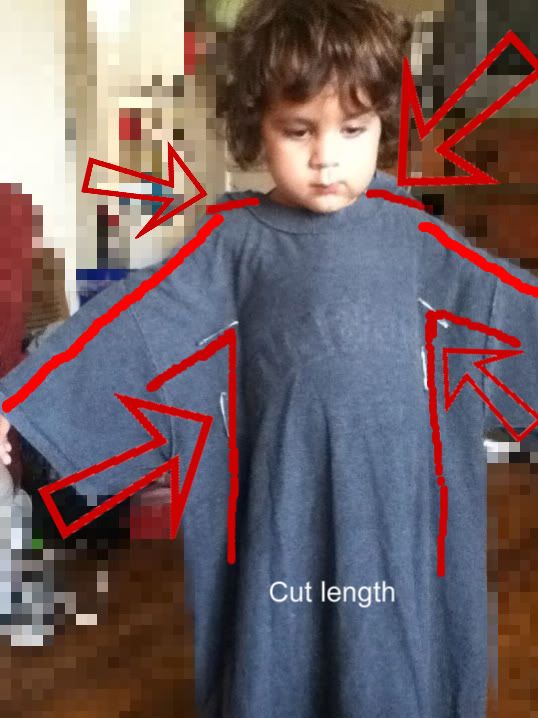
We put the T on him wrong side out so we could pin it to fit. We used LARGE safety pins. This avoids the risk of being poked. (Isn't this little guy such a patient little cutie?)

1. Pull up the shoulders first so you can pin it to avoid the the neck being too wide. Make sure it fits around the head easily to remove.

2. Have the toddler hold out his/her arms just long enough to get a good pin under. This will be where the 'sleeve' will begin.

3. Pin the sides along the waist for an appropriate fit.

4. Don't forget to mark the length you want.

5. I took my serger and eyeballed along the pinned edges. From under the arm to down the sides you are basically cutting or serging an upside down L shape on each side.

BE SURE to NOT serge or cut too close to the child's underarm OR they will not be able to comfortably remove or put on the shirt. Always better to be TOO BIG than too small...because you can always make it smaller but you can't make it bigger. IF you don't have a serger, you can simply sew a straight stitch along your lines/pins.

6. Serge (or cut & sew) the tops of the shoulders. Again pay attention NOT to make the sleeve too narrow. Line up the 'collar' so the edges are even.

7. After the underarm, sides & shoulders are cut and serged/sewn, serge the bottom or hem. I am blessed to have a serger so no hemming was required.

TaDaaaa!

I couldn't be happier with how this turned out. It took all of 10 minutes? 

And the sleeve length was perfect! An adult size, short sleeve T produced a long sleeve toddler shirt. 

The shirt cut ended up being more of a roomy-boxy sweat shirt shape but you could also ways cut/sew it narrower along the abdomen if you wanted. I didn't mind how this turned out and I can't wait to create more.

I love when I can repurpose an item into something new. I know we have a bunch of T's around here and now I can put them to good use instead of tossing and/or buying new ones that this little guy will out grow in no time!

Don't you think this would make a great GIFT for new parents?....sneak one of daddy's old favorite T's & recreate it into a shirt the toddler can wear. You can also make little pants out of old T's as well. (have I posted that before? if not, I really should!)  I have a baby shower coming up soon...hhhmmm... ;-)

For a little girl's T, you could even flare the sleeves, which would be adorable. Don't you think? So many options--it's too easy NOT to try, isn't it? This would make a great first sewing or serging project. The toddler won't mind if you make a mistake and no one will even notice. Go ahead, try it today. I know you can do it. 


Seven Alive

Saturday, October 22, 2011

For the Garden

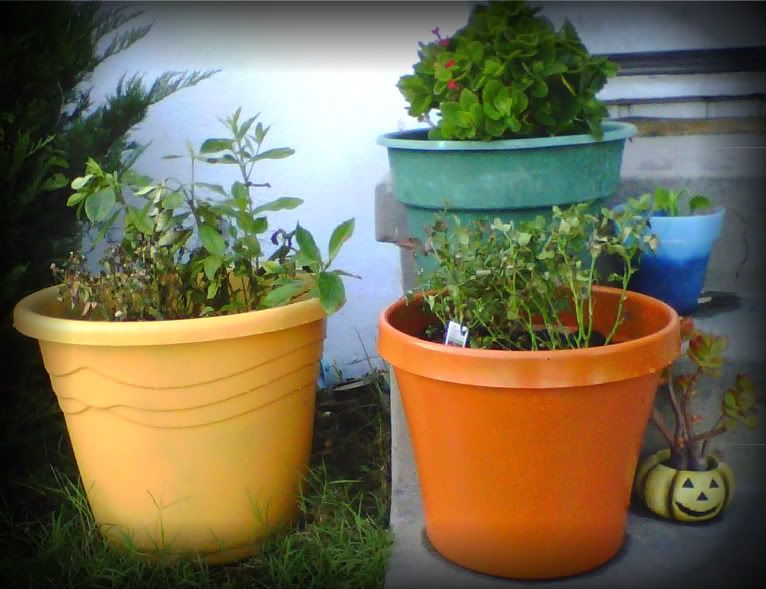
I've been working on my garden the past few months, not only adding plants but also trying to add visual interest. Being a renter, I've also tried to keep plants in pots so they are portable. A few of our pots were faded and pretty boring looking.

The other day I decided to spruce them up a bit with spray paint I had around the house. I bought it months ago for another project then changed my mind and they were never used. I decided to paint the larger one a golden yellow color and the smaller one a bright orange. The bright orange one's original color was a darker green so it ended up not being so bright, which was actually nicer. The colors go well for Fall but I think they will look good year round.

For now they are on the porch. The green one behind them could use some work, but it's harder to do while there is still a plant in it. The two we painted were empty.

My mini-roses aren't looking so hot right now. Not sure why. They were on the porch and looked lush and lovely, about to bloom again. Then suddenly a few days later they looked near death. 

The bigger yellow pot has a gardenia in it. It was looking neglected too but sprung back the next day after replanting it. Hopefully the roses will recover just as well.

Tuesday, August 23, 2011

Another Birthday Banner

Any excuse to sew? Instead of using glue to attach pieces of this super easy banner, I sewed them.

It was the Mr.'s birthday and besides the fact that he was always present (I like to surprise), I hardly had a moment to spare. So while he was out playing tennis for the morning, I went to work.

I free hand cut larger pennant triangles from fall themed paper I had, then smaller ones.  I sewed straight across the tops to attach the smaller pieces on top and to attach each pennant to the next. I left my free motion quilting foot on my machine all summer, this was another excuse to put it to practice. (And boy do I need practice using it!!!!) After all the triangles were attached, I created a string of swirls on each individual pennant. I had plenty of letters but none that went with the color scheme of the papers. I noticed some letters the day before while I was @ Target & knew they would match. I quickly went to Target, used a $5 gift card I had and paid a dollar out of pocket for a pack of alphabet stickers in the exact hues I needed.  Voila'!


Easy peasy and festive to boot!

Saturday, July 30, 2011

Water Bombs

I haven't been doing as much crafting this summer as I thought I was going to. Most recently I've been using my creative energy to over haul my home, one donation bag at a time. Getting rid of *stuff* is a major ordeal. Seriously. This led to over hauling one of the kids rooms....which led to a search for smaller beds to make their living space more spacious. They had a giant bunk bed that took up a lot of eye-room as well as much of their bed room. It had a full size bed on the bottom, which can accommodate lots of kiddos when needed but beyond that....that led me to scour craigslist for new beds. I found exactly what I was looking for, for a steal! Praise the Lord.

Once we took the old bed down and brought the new beds in....we could see how horrible the walls were. Peeling, cracked paint caused by mold *in* the walls...the paint would chip off & there would be mold *under* the paint. ugh. ugh. ugh. So that led to repainting the entire bedroom. A full day project, assisted by my fabulous sister-in-love. Thank goodness for her. 

The room is now a gorgeous, bright *white* called 'marshmallow'. ALL of that though...took a lot of my creative energy to accomplish. We're still not totally finished because now we get to use some creative energy to decorate the room in a fresh color scheme using bright accents.

Plus we've been having a fabulously active summer. I take yarn and hooks with me everywhere I go but I'm intentionally staying focused, enjoying the present moments to much to let time pass me by.

I did do a quick and easy project the other day though. Water Bombs!  I followed the simple idea in this post and produced these:

Yep! I'm totally awesome, I know. The pack of colorful sponges were from Dollar Tree, yah for $1! I also purchased a pack of zip ties from Pep Boys from around $3 and have a ton left over. (like 95! lol) It can't get much cheaper than that, can it?

Friday, July 29, 2011

Emerald City Barbie?

In *old* news I made these glamorous doll dresses a few months ago. I had green velvet-like fabric and this other sparkly green fabric that both had some stretch to it. I used the selvage edges so I would not need to hem edges. It's the most basic thing in the world. I cut a small strip for the top and sewed it into a tube shape.  Then I cut a larger strip for the bottom skirt portion and attached sides to create a larger tube shape.  I 'gathered' one end of the larger tube and attached it to the smaller tube, creating a 'dress'. Voila'! Easy peasy. I especially liked that there is no button, velcro or snaps to mess with because the fabric is stretchy. It slips on the dolls fairly easily and it can accommodate the sizes and shapes of a few different dolls, as indicated in the picture.

Don't they look like they are ready for a ball in the Emerald City?

Saturday, March 19, 2011

FREE Owl Pillow tutorial


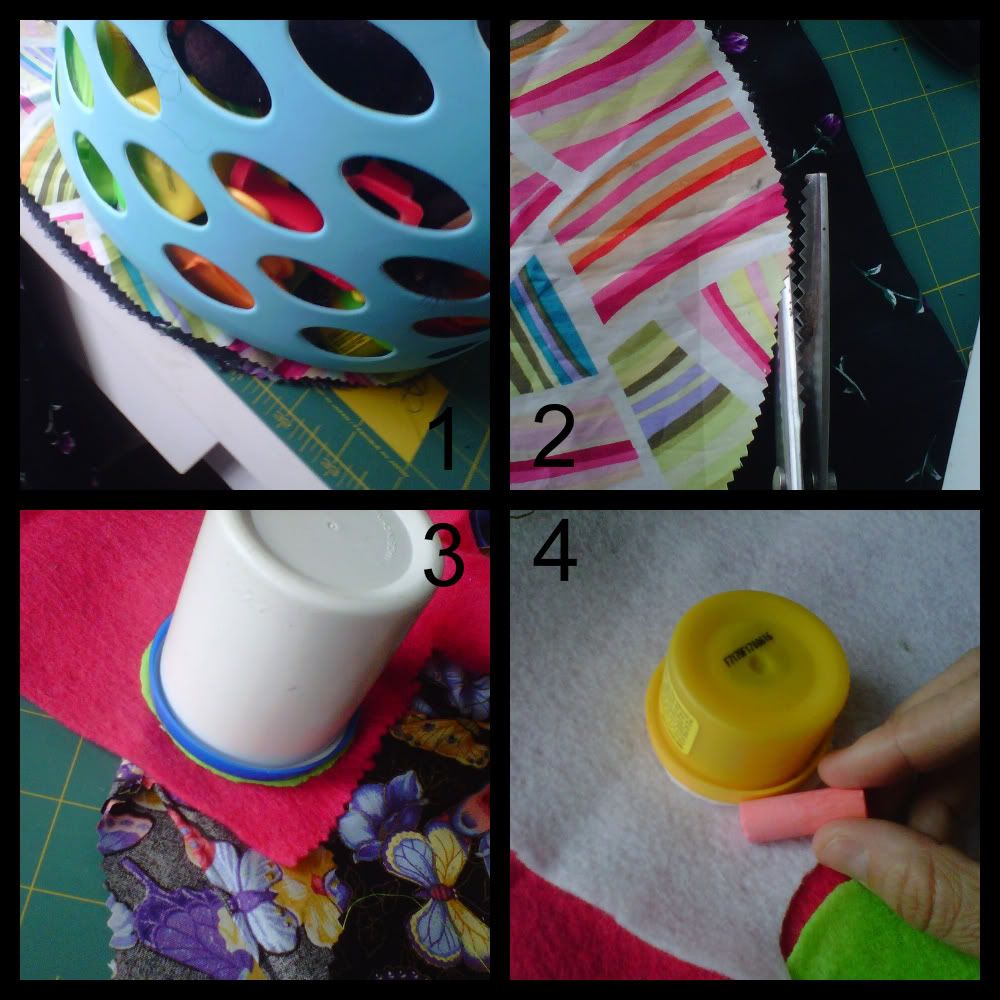
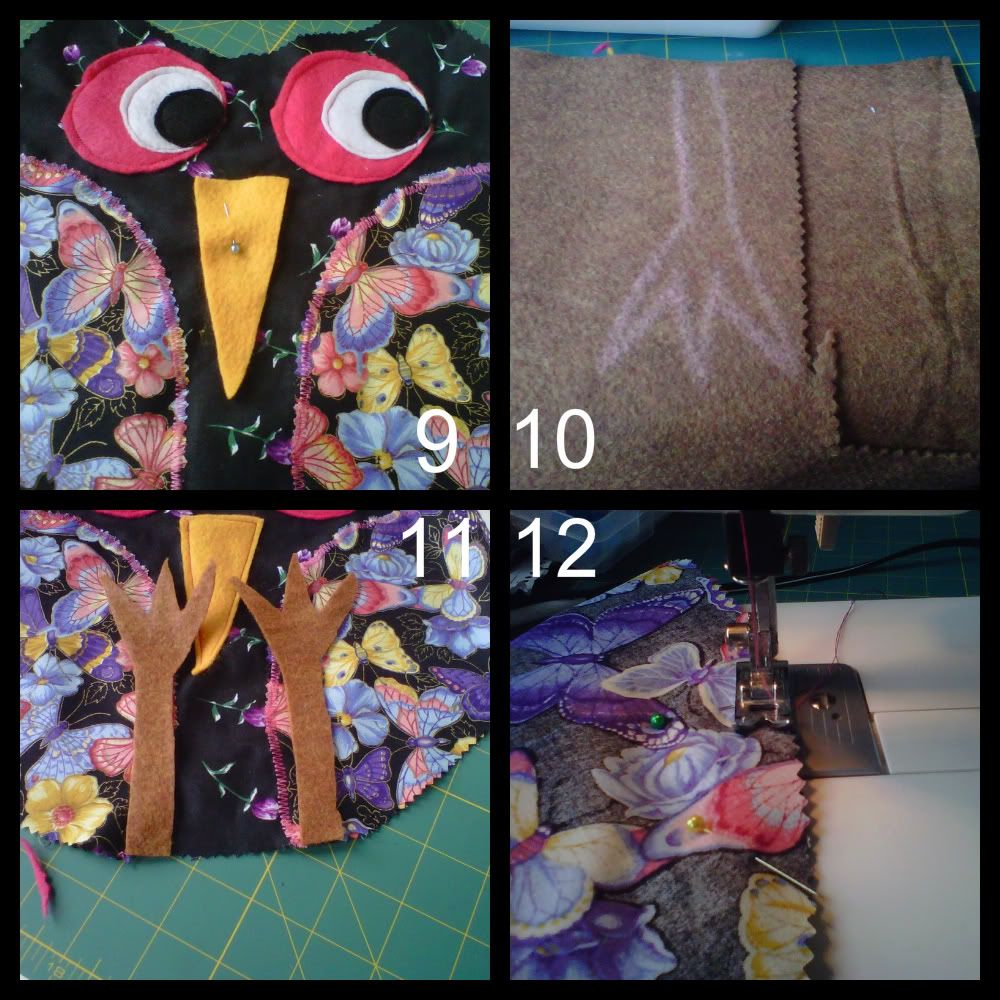
1. Decide how big you want your owl pillow to be. Find a circle shaped object you can trace. You can see I used the bottom of a basket. You can use chalk to trace around your object. Add two peaks, one on each side of the top of your circle to create the owl 'ears'.

2. Cut out your shape. It saves time to cut @ least 2 pieces @ a time. (front & back) You can also layer 4 pieces and have enough for 2 owls in the same amount of time. (I hate cutting so I look for short-cuts all the time!)

3. Again, find a smaller circle shaped household item that you can trace for the outer eye. Cut 2.

4. Find a circle slightly smaller for the white of the eye. Trace & cut 2. Do the same for the black center of the eye, or you can cut those freehand.


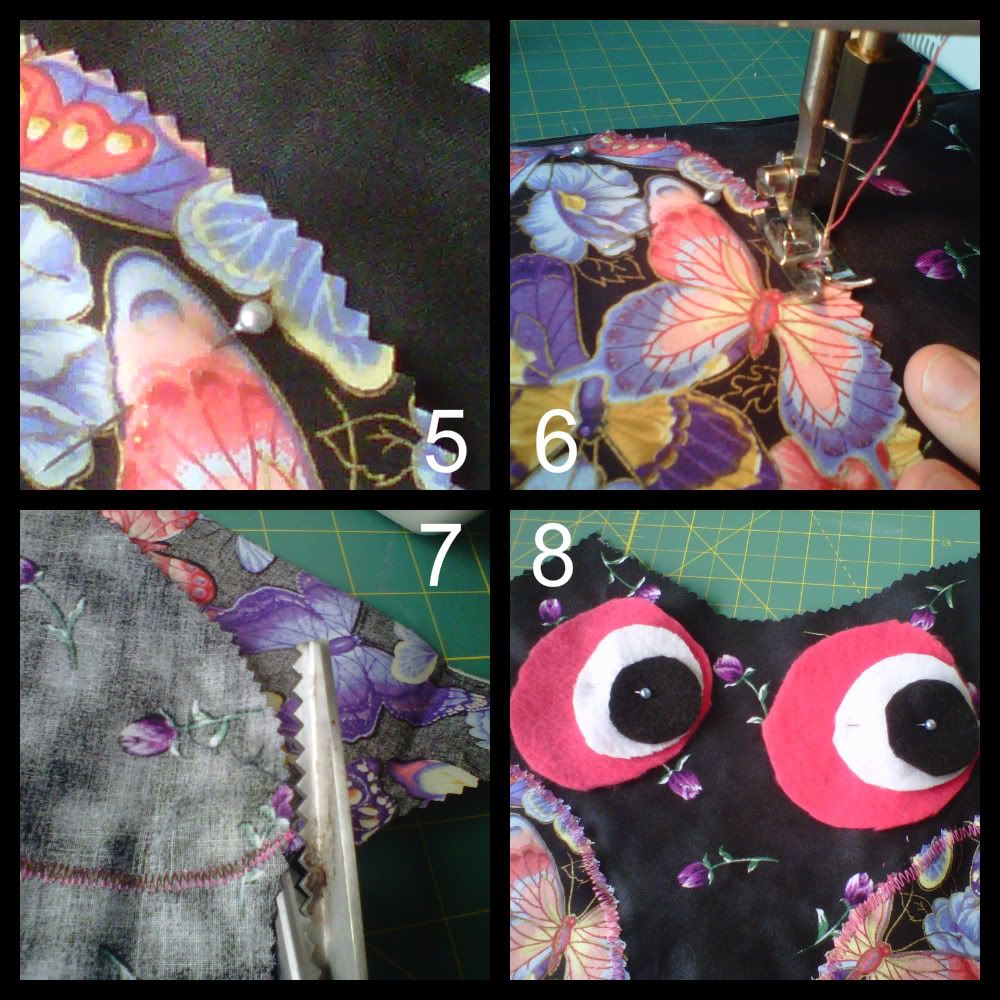
5. Cut 2 half circles or oval shapes out of coordinating fabric for 'wings'. Pin to front of owl right side facing UP.

6. Using the zig-zag stitch setting, sew wings to front of owl.  You only need to sew inside edges.  (the outside edges will be sewn later when you attach front & back)

7. Cut off any excess wing fabric to align to owl body edges.

8. Arrange eye circles as shown & pin.  You can play around with them to create different moods for your owl. (centered, looking up, looking right, looking left etc) When you are satisfied, sew eyes using straight stitch.


9. Cut and pin beak to front of owl, between eyes. Again, you can personalize your owl beak by making it fatter, shorter, narrower etc.

10. Draw legs (using chalk) to your preferred design. (super long & skinny, fat feet etc)

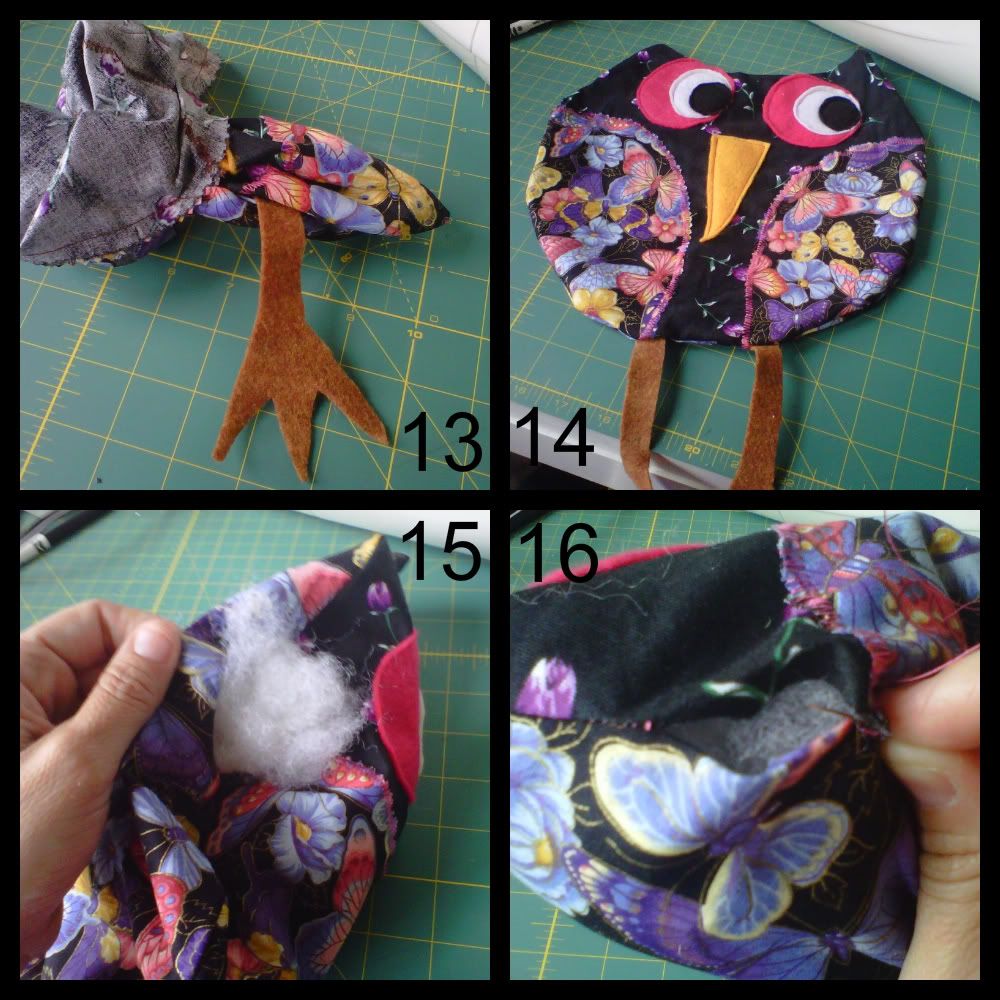
11. Attach legs, as shown, to bottom edge of owl body, upside down.

12. Place *back* of owl, right side *down*, on top of owl face.  Pin edges,sew along edges (leave seam allowance) using straight stitch. I like to back stitch over legs to reinforce. REMEMBER to leave a portion OPEN &  unsewn for stuffing.


13. Reach in through opening of body & carefully pull owl right side out.

14. Inspect your owl that all edges are properly sewn, no leg missing or open seams (besides stuffing hole) etc.

15. Begin stuffing your owl. Use plenty of stuffing and be sure to get into 'ear' peaks. A pencil or crochet hook may be useful for those spots.

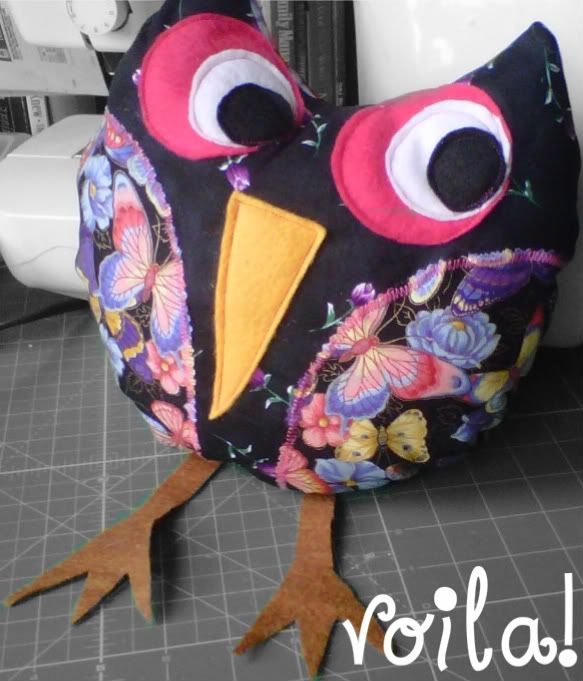
16. If you are satisfied with the shape & fullness of your owl, hand stitch closed. 


What I have shown you here, I believe is the simplest form to start with, using basic shapes. (mainly circle & triangle) *I* like to use felt for the eyes, beak and feet/legs, but feel free to experiment and have fun with it. I have also made stuffed legs and printed fabric eyes. Use your imagination and have FUN with it!

Let me know if you have any questions.
And OF COURSE, show me what you come up with.  

I'd appreciate a link back if you use this tute & find it helpful.  Feel free to create to your heart's content. ;-)


Monday, February 07, 2011

Free Printable

Simply click on the graphic above.  When it opens in a new page, right click to save to your computer.  From there you can print directly from your computer.
Link back and show me what you did with it!
And of course, let me know if you have any problems. ;-) 

I printed it on an index card and then framed it in a frame I purchased from the "after-Valentine's-clearance" a few years ago.

Thursday, January 20, 2011

Inspired by...

There are so many talented & crafty gals out there in blogland.  They also love to SHARE their ideas. Recently i came across this freebie, a sweet printable.  Well, my home's main decorating color is red--which goes right along with my love of all things Valentine!

I found some old thrifted frames in my "linen closet"--I have NO idea why they were in there.  They had patriotic designs on them.  I got them back when I was designing my middles room in patriotic colors but I never used them.  My daughter claimed one but I went to work on the other one.  

It is much smaller than the link above uses.  I adjusted my print preview to %60 to try and make it fit better to the frame I had on hand. I cut out the center to place *inside* the frame, under the glass.  I could have adjusted it smaller, I think but I finagled it to work well enough.  I had to cut the "frame" portion of the design apart but it's ok.


Nope, it's not a smudge on your screen or on the glass of the frame..(upper right corner above "always")..one of my darlings stepped on the paper as I was on the floor cutting out the rest. {sigh} I couldn't get the dirt off & don't feel like wasting the ink to reprint a full 'nother one. 

OTHERWISE, it looks pretty cute doesn't it?

Join the Valentine, linky, fun & enter the giveaway @ Domestic Fashionista!

Friday, January 07, 2011

Take note

For the second installment of a tea I again hosted, I could not find the mini composition books.  I did find these little top-flip notepads.  They had a sturdy cardboard back but no front cover.  I thought I might make a sewn felt flip cover but decided to use paper instead. It was great.


I simply cut paper to fit the front 1.5x the height of the book.  I folded it over the top and glued it to the back. To add a little more flair, I used rub on transfers I had, of inspirational words and definitions.  I think I've mentioned before how awful I am at cutting so that was the hardest part. I'm sure a paper cutter/trimmer could work to make this part of the process easier but I always forget I have one.

Monday, December 27, 2010

Free crochet snowflake pattern

My first pattern!

I made these little ornaments for the season. I created the pattern myself although you can find many similar free patterns online.  I've tried writing my patterns down in the past, and let's just say, it didn't go very well.  This one is simple enough that I think it's understandable. If you are an experienced crocheter, you can create your own pattern and/or you can even add more *arms/petals* to it, to create various sizes.


H hook (but really, you can use whatever you have or can find--I lose my 'favorite sizes' often! LOL eyeroll)


chain 4 (or start w/ magic ring),slst (slip stitch) in first chain to create ring.
round 1: work 6 sc in ring, join with slst
round 2: 2 sc in each sc (12 sc) join with slst
round 3: chain 3 in next st (counts as dc), 2 dc in same stitch, sk next st, *3 dc in next st, chain 1, skip next st, repeat from * 4x, join with slst
round 4: chain 1, slst in first chain, * (sc, dc, sc) in next st, sk next st, sc in ch-1 sp, sk next st, repeat from * 5x join with slst.
Pull loop up to create a long loop for hanging. Knot at bottom to secure.

If you use white yarn, these look like snowflakes, don't they?
If you use cotton yarn, they make great make-up removing or small facial cleansing cloths.

You can create a garland by *not* pulling up yarn loop & cutting. 


My gift to you.
Merry Christmas!

Sunday, June 27, 2010

Another Birthday

Both my middles have birthdays in June.  Exactly one week from each other.  The older middle wanted a party themed after the latest Tim Burton version of Alice in Wonderland.  I did what I could and here are a few things I came up with.

Birthday Banner


Here are some of te cupcake toppers.


I went more with a Mad Hatter-wacky style and look.  I think it fit well enough.  The initials belong to both middles.  He was very happy with the final result.


He turned the big 1OH! :-)
Now I'm working on an Alice inspired lap quilt for him......

Saturday, April 10, 2010

Anything for my sweet prince!

Naturally wanting to make Baby K's first birthday extra special, I decided to go with a *real* theme.  I looked on ETSY for inspiration and found a party them using tiffany blue and lime green along with a frog prince. Perfect! With only 10 days to spare I went to work. I had a hard time finding papers in the colors I wanted but in the end I found packs of blue/green papers @ Target of all places for only $.99 cents! Can you believe that?

I created cupcake toppers and a birthday banner.  It doesn't sound like much but add to that all the regular party fare....and you get the idea.  We ordered a custom pinata that matched perfectly.  I also coordinated plates, cutlery and napkins.  I used a boxed cake mix this time but homemade frosting--I made the green frosting peppermint flavored and WOW was it delish!!!

I realized later, this was the same color theme I had for his baby shower.  How sentimentally sweet, right? The banner pix did not come out very well so I'll have to show them another time, but just know--it was adorable. ;-)  I'm going to use the cupcake topper cards to decorating thank you cards. I hate to just throw them away.

Monday, January 18, 2010

Recycled Christmas lights

I LOVE being able to recycle/repurpose/refashion every day items instead of throwing them away.  Over the Christmas season I was quite dismayed to find that *most* of my fairly new (ie: only a few seasons used) lights were not working properly. What is the deal with that anyway?

I could not, in good conscience, just throw them away.  I tossed them into the garage w/ the other junk Christmas decorations.  Then as my most favorite holiday approached--VALENTINES--and my creative wheels began to be inspired by all that is LOVELY, PINK & HEART shaped....I remembered those naughty lights.

I saw a rag garland over priced at a local crafts store. I knew I wanted it and I KNEW I could make it myself. The heart shaped light bulb began to go off in my head.  I could use the broken lights as the base to my garland.  I delegated oldest ds to dismantling the light strand while I began cutting strips of fabric.  The fabric choices I had laying around were: Hawaiian print w/ orange/red/hot pink & yellow colors, bright pink checked, lt. pink, bright pink solild, solid red corduroy, red/white polka dot, red checked ribbon, wide red sheer ribbon, lt pink w/ bright pink flowers.

It's coming along nicely and looks absolutely fabulous.  Plus it's much longer than the store garland.  It's going to look great along the top of my front window!  Oldest was able to salvage 2 separate 2 ply strands after all the lights were off. Although this garland would also look absolutely fabulous on a strand of working red lights, don't you think?

It doesn't get any easier.  Simply cut strips of fabric and tie on.  Voila'!