Showing posts with label sewing. Show all posts

Tuesday, January 29, 2013

You can call me, MR. Owl

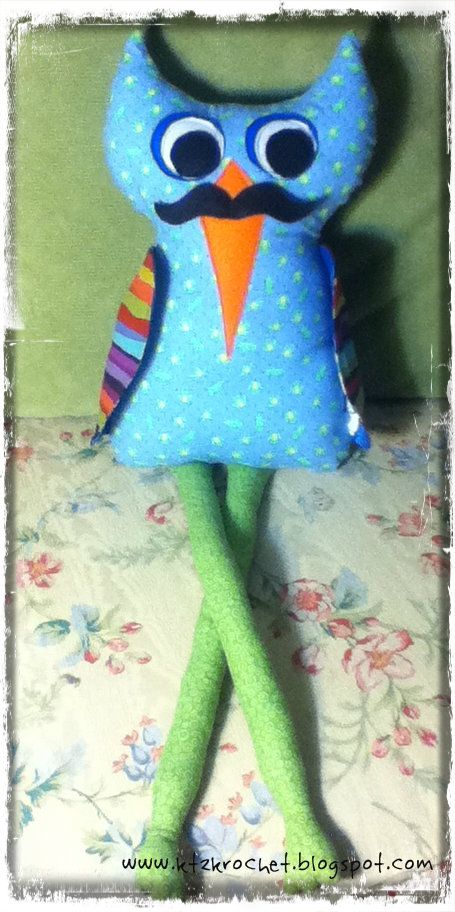
I no longer have a camera or a phone with a camera--so I am very limited to sharing my creations and recent craftiness with you. I have to bug my oldest son to snap a pic when I can. Here is a recent order I completed.

A friend placed an order for her son's birthday and this is what I came up with.


I added the mustache last minute,  on a whim and I really like it. Yep, it's trendy, but still cute. The body fabric is light blue with small green frogs. The back of the owl's body matches but has large green frogs. The inside of the wings are a different fabric too...it's the light blue with tiny darker blue polka dots, it coordinates...I think that is what fabric I used. I can't remember exactly now. 


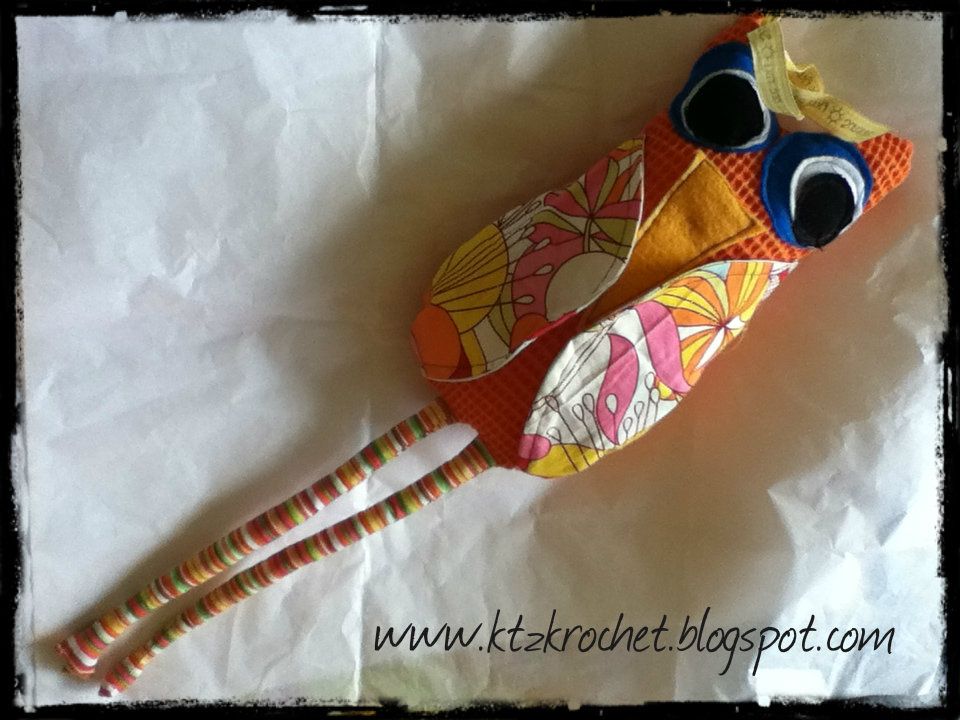
I think this was the first owl I made with really long legs and flappy wings. There have been quite a few others between this one and Mr. Owl with the mustache...but again--NO camera. boohoo!

This one was also a birthday gift for a baby cousin. I created dollies with wings, turning them into fairies and Ms. Owl, with lovely eyelashes. each one is a totally unique, one of a kind creation. I get a color scheme from the client and then fulfill the order by mixing and matching fabric choices based on their color scheme.

I have an order cut right now that will be using red, white and blue coordinating fabrics.  She should be finished within the next few days.

Monday, May 28, 2012

Knock-Off Drape Dress


Garment Sewing Challenge: May 2012


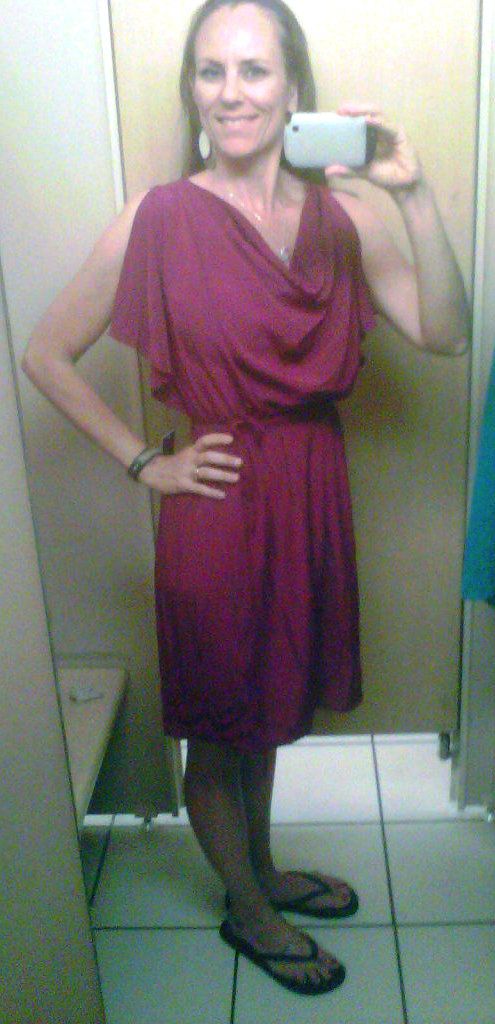
I was searching for a dress for my graduation and this one at Target caught my eye. It was $24.99. The fabric was a nice and soft polyester. It didn't seem to be a very complicated style though...or so I thought. I was sure I could recreate it myself. I loved the knee-length and the no-cleavage-show neckline.

Here is the inspiration dress--from the dressing room in Target.

It's flattering, right?
How hard could it be...it just hangs there...

Initially, I went to work to find a pattern. Guess what? NO pattern. Trust me I searched the pattern books, online AND in person. I was going to have to go this *alone*.

I did find an online tutorial for a sleeveless maxi-dress that had a slight drape along the neck--but otherwise, it was nothing like this dress. I used that tutorial simply as a yardage reference. It recommended 1.5-2 yards of fabric.

I also wanted this deep magenta color. I headed to Joann Fabric's to see what I could find.

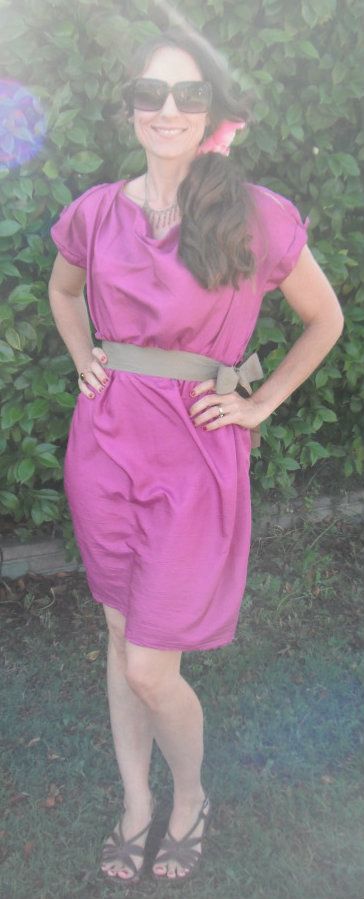
I purchased the closest thing to magenta they had and a green in the same--both fabrics were polyester, which is exactly what the original fabric was.

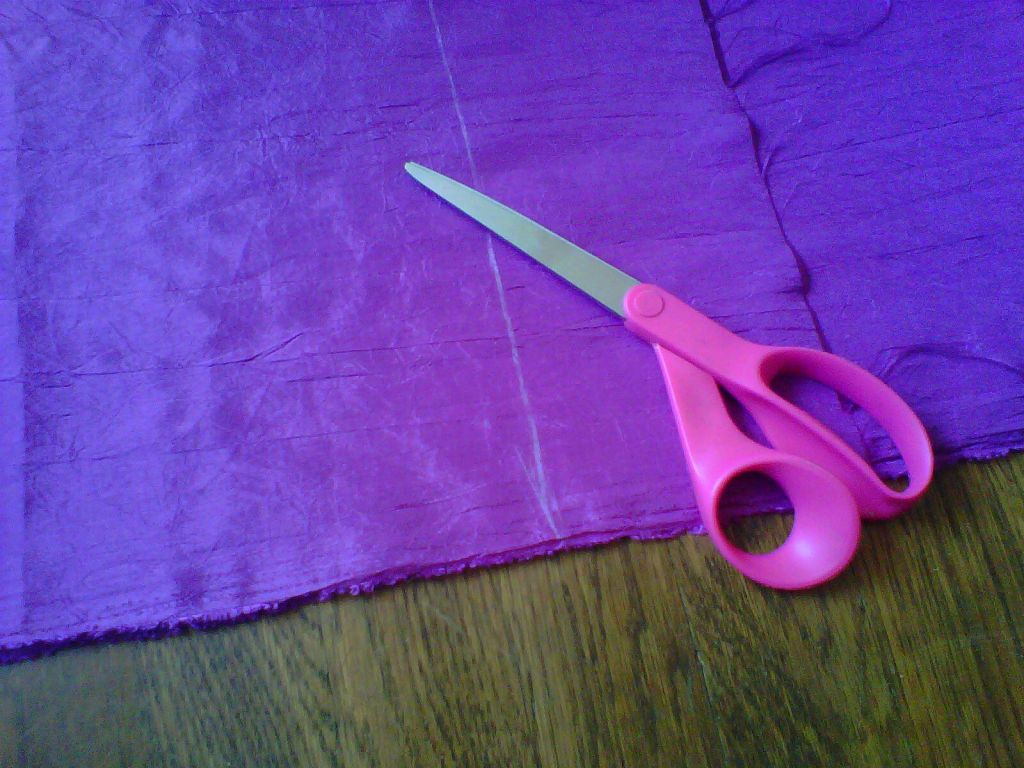
 Oh! I was SO afraid to actually CUT the fabric. I finally went back to Target & purchased the original dress so that I could take it's measurements and inspect it a little more closely. I purchased it in green so I would not be tempted to keep it.

I wrote down all the measurements and promptly returned it.


I finally built it, after fighting with the bobbin thread. The front was not as drapey and the sleeves were too short? I realized the front was supposed to be 48 in across and I had cut it to 36 in across. EEK! Ok...I cut two panels and added them to each front 'sleeve'. Ok..it could work.

I sewed an elastic waste. I used a circle of elastic I had in my stash--from a pair of underwear (I always salvage the elastics) one of the dogs had chewed! The waist ended up being a tad bit too high and the sleeves a bit uneven.


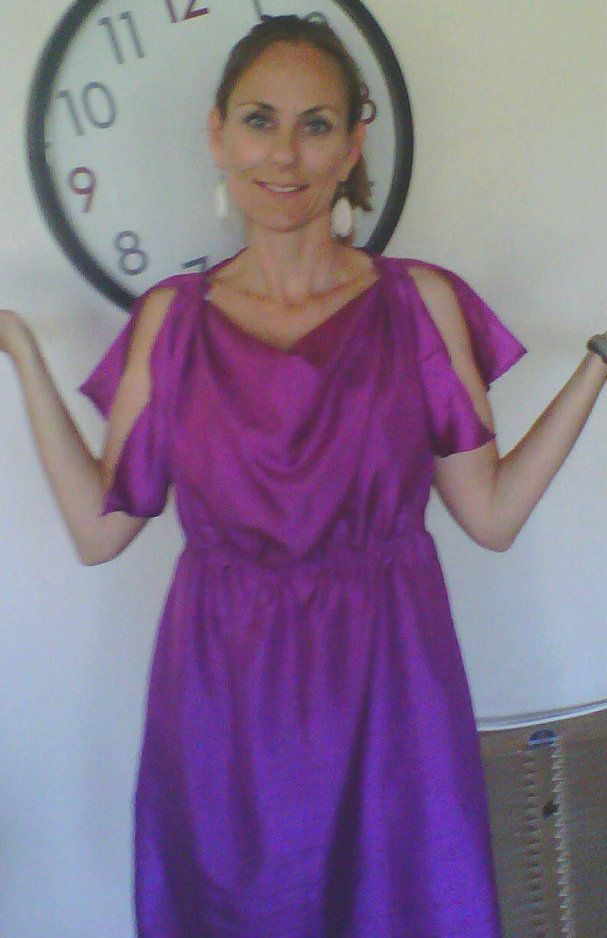
BUT otherwise, I LOVE it! I tied the sleeve edges together and you don't even know they are uneven!

TADA!!!!

It was a little breezy when I took this pic. Sorry.
I wore this dress to my graduation banquet.

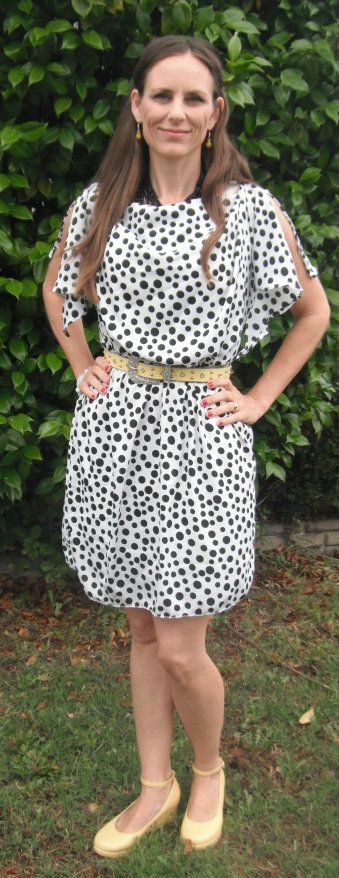
Then I found another polyester fabric that had a different weave that was much closer to the fabric of the original dress...I knew I just HAD to use it for my actual graduation.

THIS is my entry for the sewing challenge!
The school colors are black & yellow. My DIY invitations -announcements  were black and white polka dots with a yellow ribbon accent. I knew I just HAD to get this fabric and accent it with yellow.

The sleeves came out much better since I paid better attention to the correct measurements the second time. haha.

This fabric draped much nicer. The neckline actually drapes lower than this picture implies.

I have two more fabrics to make two more dresses. I LOVE this style THAT much. (oh--so that makes 4 dresses for just a little more than the price of the ONE original dress after I purchased sale fabric & used a coupon! Kerching! Kerching!)

The hardest part was the shoulder seams. The front neckline is actually folded under and sewn to itself with the back neckline in between. It created some trickiness for sure.

What I love most about this style is the ability to dress it up with accessories and heels or dress it down with casual flip-flops and no belt. As far as building it-it's also VERY forgiving to create. The addition of a belt or ribboned waist hides any perceived flaws in the elastic waistline. It's also a flattering shape for the body because it is not clingy. It's comfortable and easy to move in because of the flow and loose style.

Except for the slight issue with the shoulders...the style isn't too hard to actually build. I didn't even hem either one of them. The pink (can that pass for magenta?) one I kept the selvage edge along the bottom so I wouldn't have to hem. The polka dot, I simply serged the bottom. When I make another one...I will probably serge the sleeves as well. (I did tiny hems on all the upper body edges)

Do you want to make one of these dresses now? I think you should. I'm thinking there are so many possibilities....ribbon tied shoulders? tank cut shoulders? etc.

Just keep picturing it as basic shapes: rectangle bottom and upside down triangle for the top. Voila'!
If you make one...be sure to share it w/ me cause I'd love to see it.

Linked to:


Visit My 1929 Charmer Blog!
Our Delightful Home

52 Mantels

Monday, January 09, 2012

Skirt to Scarf

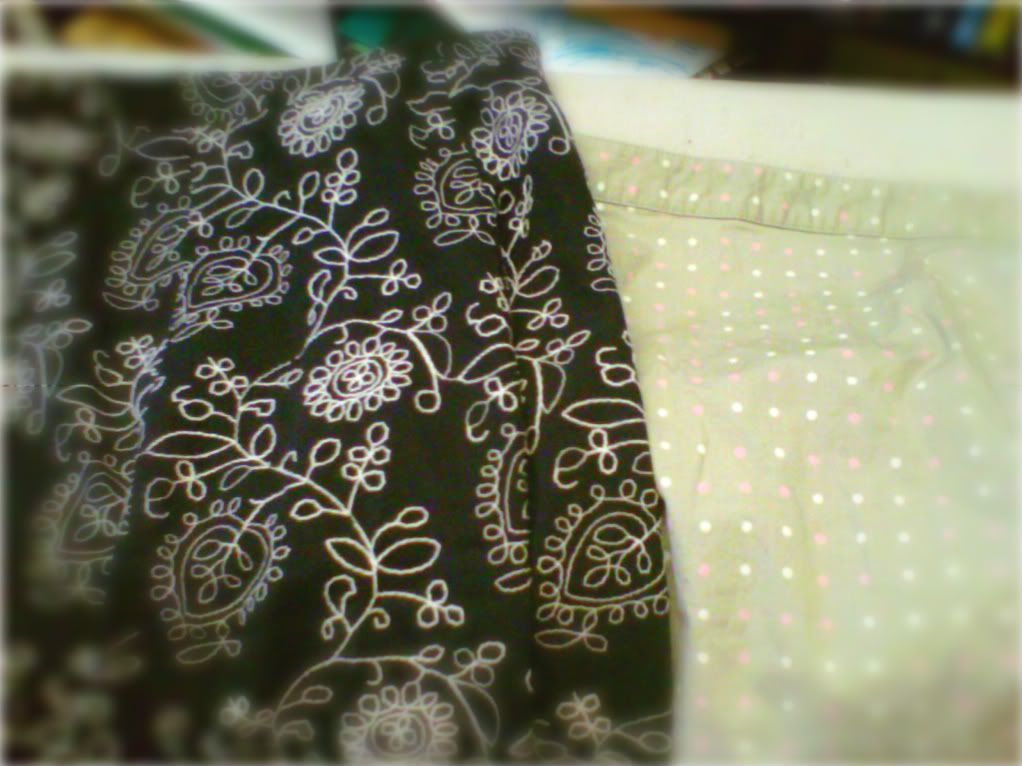
I needed a gift for  a friend so I dove into my donate stash and found these two skirts. I knew exactly what I wanted to make: a fabric scarf.


(forgive the pics...toddler got to the camera and it seems to be permanently out of commission. SO I had to take these with my phone. Boo!)

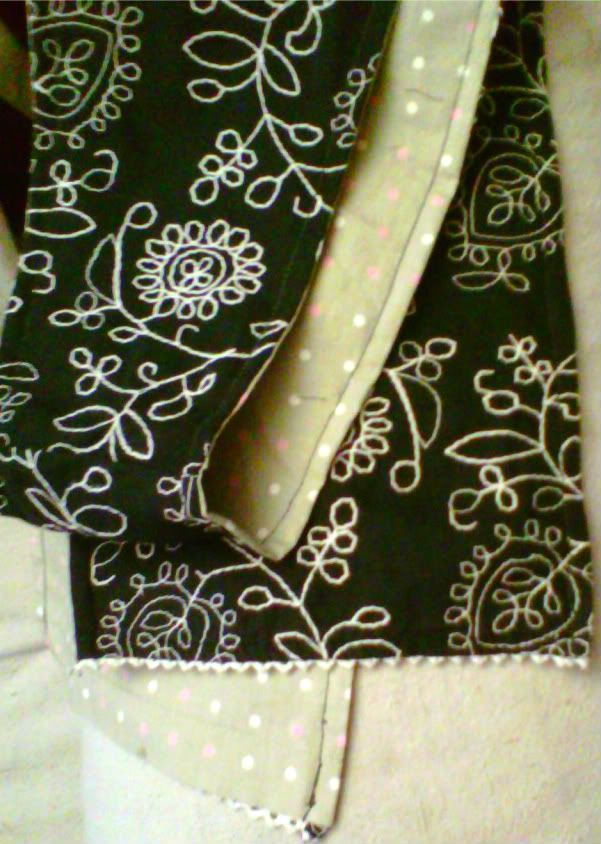
I chose the black skirt especially for the trim. The other fabric is a nice neutral. 


Tada! Reversible scarf!

Friday, November 25, 2011

Recent Treasure finds

To go along with my recent Creative Myths series, I wanted to share some recent thrifted treasures.

This stash was from a bag of notions. I don't remember exactly but I think the bag was no more than $2.95. It contained mainly vintage sewing notions. I couldn't resist. There were two packs of snaps, two small containers of grommets, hook & eye closures, collar stays, elastic, vintage lace elastic, wire stays, roll of pink binding, a few patches, ribbon, vintage lace, vintage wool mending yarn, crochet hook w/ wire (& knitting needles w/ wire not pictured) and some other items I am not sure what they are but they look cool.

Then I found this fabulous treasure for $1.95:

The roll is 10 yards of brand new flat white lace, and tons of other lace trims:TONS. I wish you could see the cream eyelet trim up close. I think it's my most favorite. But...the BEADS! What a steal, huh? They are so pretty and lovely!!! Who knows what project will grace their trim.

TRUE CONFESSION TIME:
When I'm at the thrift store & I see home made items...I feel SO bad for them. I wonder if that is what will happen to all the home made gifts I give....they will be donated to the thrift store!?!
I know how much time and energy goes into a crocheted blanket or home made quilt. Many are very lovely too, not just yellow baby blankets. I always want to buy them all...out of appreciation if nothing else.


So the other day...I did! Birdy and I found two big bags of crochet granny squares. I have not counted them all yet but I think there might be around .... 200? Maybe. They are in the loveliest colors too!


These pix do not even show them ALL. many of them are squares with a flower in the middle. So lovely. Both bags together were under $10. We have big plans for all of them. Some will be a blanket, then maybe a scarf, a bag...so many possibilities.

Even when you are low on funds, as you can see, you can find plenty of materials for inexpensive at the thrift store. I know you can find items at yard sales too! Don't be afraid. Get to crafting!!!

Sunday, November 06, 2011

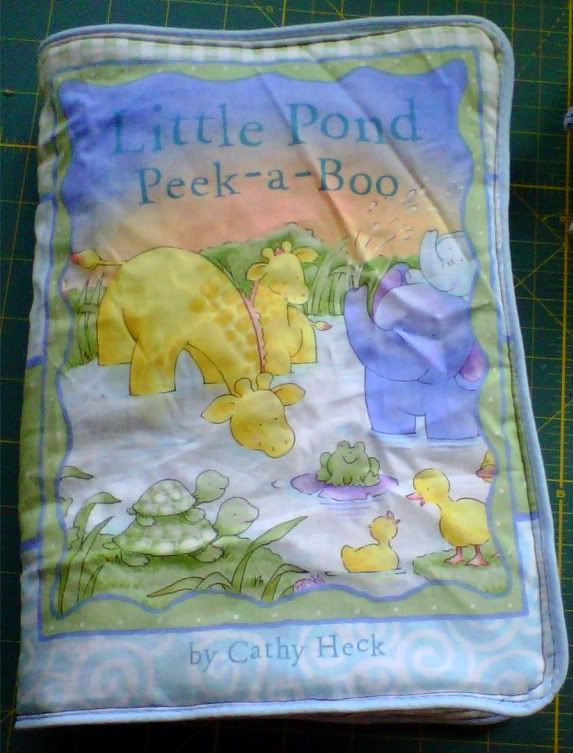
Baby Book

Another baby shower, another baby gift. I had a root canal on Friday--& it was much more traumatic (ie: *painful*) than I expected. I had planned on creating my gift on Friday but just couldn't. I was pressed for time on Saturday, the day of the shower, and needed to change plans slightly.

I made this cloth book. It was plan B, admittedly. It is an easy go to & makes the perfect gift for a little one. A baby can chew on it, spit up on it, drag it around...Hey! It can even double as a burp cloth over your shoulder--just flip the page each time. haha.

Then just toss in the wash!

Cloth books make great beginner sewing projects & the recipient will *always* love them & won't even notice any mistakes.

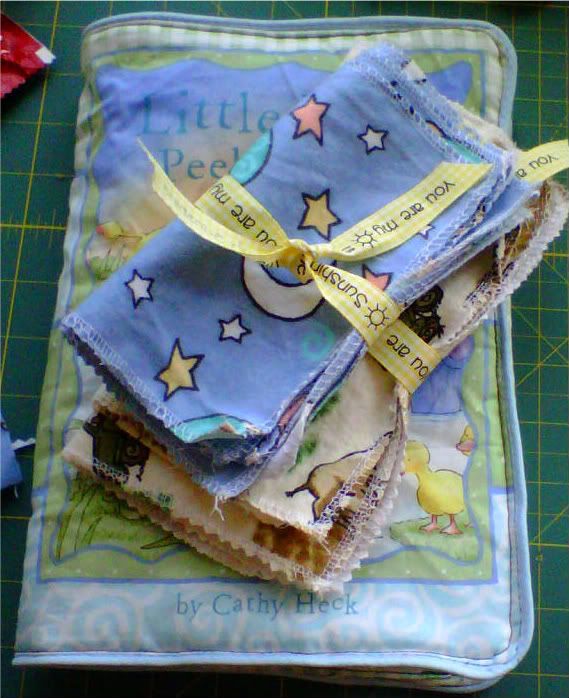
Since I was unable to go with my original gift idea, I also added home made baby wipes/wash cloths.  Another simple 'go-to'. 


I cut squares of flannel I had on hand and serged all around the edges. Voila'!

Soft, economical AND eco-friendly + an easy way to stash-bust. 

I wrapped everything in a sweet bow and placed in a brown paper gift bag. Birdy cut out & then glued on extra fabric motifs from the cloth book to the sides of the bag.

The recipient loved it.
And her shower was absolutely lovely!
The table centerpieces were gallon sized succulents wrapped in brown paper & twine. Each guest received a small succulent plant wrapped the same way. So sweet. The best looking gender-nuetral shower I've ever seen. (the parents to be have chosen to keep baby's gender a secret--even to themselves-how exciting!)

Tuesday, November 01, 2011

Felt Halloween Candy Bag

Although my kiddos each made their own individual costumes this year--I couldn't *not* have my hand in something! We dressed the toddler as an Angry Bird (based on a video game).  I figured I could @ least make his candy bag.


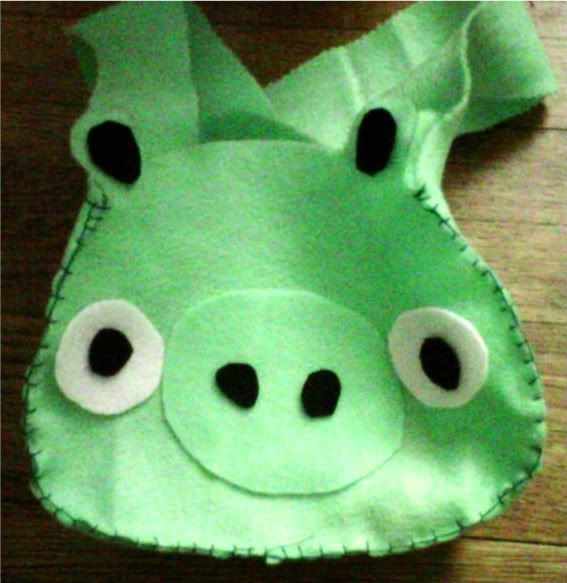
His trick-R-treat bag is a pig character from the game. (the birds are shot @ the pigs) I thought it turned out adorable and was very simple.

I hand sewed the primary bag pieces together. The rest of the facial pieces were hot-glued on in the name of time efficiency. I used green felt I had on hand and bits & pieces of black & white felt.

He was able to wear it messenger bag style--across his chest. ;-)

Felt is such a good choice for simple or beginner crafts. It doesn't fray when cut so it never needs seams or serging. It's also great for use with crafts for children as well a wide variety of other crafts like: felt flowers to be used as brooches or hair pins, hand or finger puppets, ornaments, book covers, baby shoes, holiday garlands, pin cushions or as an accent on an already made project. Just google felt crafts to find inspiration.

Wednesday, October 26, 2011

I don't have TIME to sew...and other creative myths #1.

The idea of working on a a project, can be more over whelming than the project itself. I'm a busy wife and mom but I make time to create. It feeds my soul in numerous ways and if I neglect my creative side for too long I has a negative impact on my psyche. Really. I truly believe creativity is good for one's mental and emotional state and probably even spiritual state.

I want to enlighten you to many of the myths we tell ourselves to hold back those creative forces and offer you the truth...or at least some creative solutions to the obstacles that hold us back. This series will focus on one myth per post and offer some tips and tricks to help over come the creative myth.


Creative Myth #1

I don't have time to sew!

Break it down into bite size creative chunks: Any project can be broken down in to smaller time increments. For example, cut your fabric pieces one day and put it away. The next day sew parts of it together. The day after that, do the hem. etc. You get the idea. Fight the feeling that you *must* complete a project in one sitting.

Learn short cuts: if you're making a clothing item for around the house, let's say for a child, it does not need to be perfect. Especially play or lounge clothes! The children won't notice or care. They don't need French Seams or that every seam be serged. Of course you want it to last until they out grow it, but that usually happens sooner rather than later. Pinking shears (the scissors that cut in a zig-zag pattern) are very useful to help prevent fabric from fraying. Save the attention to detail for special occasions.

Ditch the pattern: patterns are great tools for learning to sew new items. They are not always necessary though.  You can find lots of free tutorials online these days that instruct how to create various sewn object using pictures and instructions. Using patterns unnecessarily uses up valuable time. 

For example:Do you really need a pattern to create a skirt? Guess what? NO! A basic skirt is a tube of fabric! Get it? Cut a large strip, sew up the side and fold down the top, sew leaving a small opening. Insert elastic OR even better a ribbon you can tie to fit you perfectly. If you are an *absolute* beginner and have *never* sewn anything before, then look online for how-to's to fill in the fine details.

You can use clothing you already have as a sizing guide instead of purchasing a pattern and taking time to figure it out and cut out the pieces.

Leave your machine out: I know, you're worried about what type of example you'll be setting for your kids if you don't put away your supplies *as soon as you finish*, right? Well, you are NOT finished! It can be tedious to have to unpack your sewing machine each and every time, just to have to immediately repack it away because the baby woke up unexpectedly or the 8 year old needs help with their spelling words or you smell the brownies you forgot about, burning--you get the idea.

Leave it out! If you are using your dining table to sew, then store it under the table where you can easily access it tomorrow. When you have only 10 or 20 minutes, you need to conserve those seconds when you can! You can put away the machine when you are expecting company. ;-)

What you can do with ONLY 20 minutes:
cut fabric pieces
sew a dress
sew a hem
sew a casing for skirt or child pants
attach two legs for a pair or lounge pants
cut fabric for an owl pillow
cut squares for a quilt
pin a 'quilt sandwich'
measure your child's waist and legs for width & length of pants (don't forget to write it down)
Find an item of clothing in the closet that fits well, to use as a sizing guide.
gather a ruffle or a skirt

You get the idea. Once you get started and have everything in perspective, you will be amazed how much you CAN get accomplished in very little time at all.

Hey! Go set up your machine and get started before the brownies burn. ;-)

Tuesday, October 25, 2011

Big Brother T to lil brother T: make your own toddler T-shirt

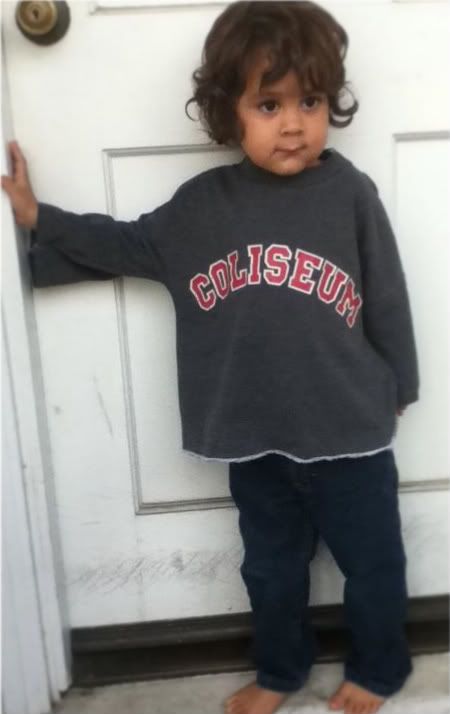
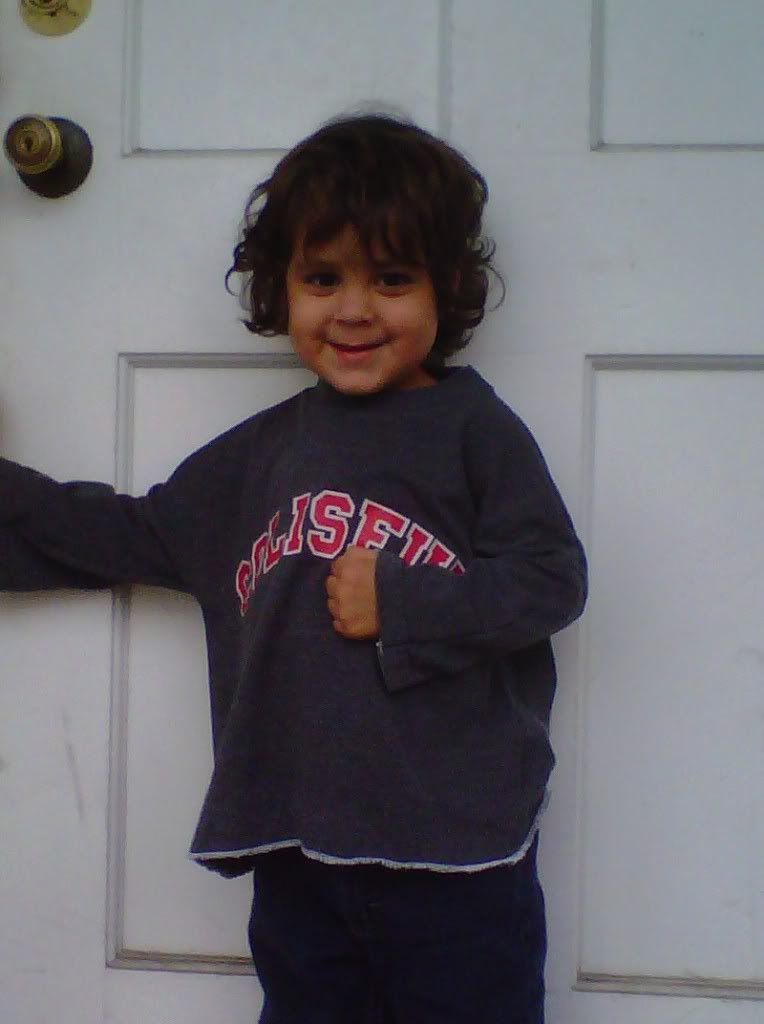
The toddler needs clothes. Really. He has outgrown all but one pair of jeans. The temps have taken a dip so he also needs some long sleeved T's. I haven't gotten a chance to go to the thrift store and I really hate to spend money unnecessarily. In an instant I told oldest to see if he had a T-shirt he no longer wore, maybe was too small...I wanted to see if I could make the toddler a quick shirt.

It was ridiculously simple. Sorry for the poor pic quality--I always think to take pix too late. Here is a semi-tutorial for using larger T's to create a piece of toddler clothing.

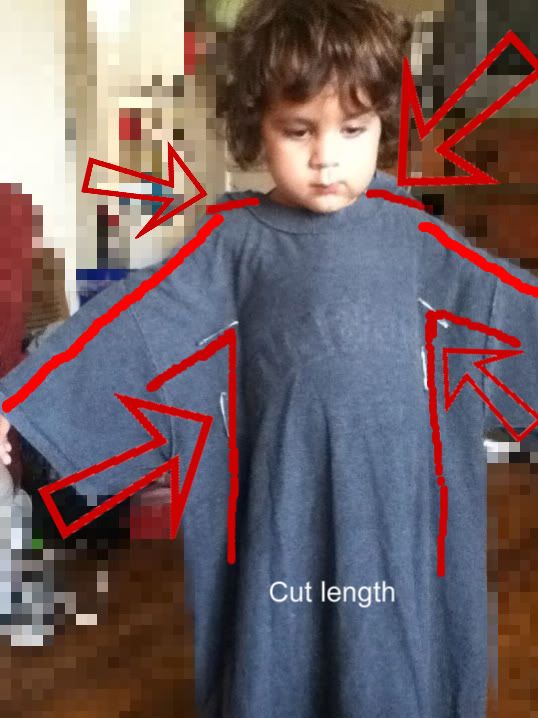
We put the T on him wrong side out so we could pin it to fit. We used LARGE safety pins. This avoids the risk of being poked. (Isn't this little guy such a patient little cutie?)

1. Pull up the shoulders first so you can pin it to avoid the the neck being too wide. Make sure it fits around the head easily to remove.

2. Have the toddler hold out his/her arms just long enough to get a good pin under. This will be where the 'sleeve' will begin.

3. Pin the sides along the waist for an appropriate fit.

4. Don't forget to mark the length you want.

5. I took my serger and eyeballed along the pinned edges. From under the arm to down the sides you are basically cutting or serging an upside down L shape on each side.

BE SURE to NOT serge or cut too close to the child's underarm OR they will not be able to comfortably remove or put on the shirt. Always better to be TOO BIG than too small...because you can always make it smaller but you can't make it bigger. IF you don't have a serger, you can simply sew a straight stitch along your lines/pins.

6. Serge (or cut & sew) the tops of the shoulders. Again pay attention NOT to make the sleeve too narrow. Line up the 'collar' so the edges are even.

7. After the underarm, sides & shoulders are cut and serged/sewn, serge the bottom or hem. I am blessed to have a serger so no hemming was required.

TaDaaaa!

I couldn't be happier with how this turned out. It took all of 10 minutes? 

And the sleeve length was perfect! An adult size, short sleeve T produced a long sleeve toddler shirt. 

The shirt cut ended up being more of a roomy-boxy sweat shirt shape but you could also ways cut/sew it narrower along the abdomen if you wanted. I didn't mind how this turned out and I can't wait to create more.

I love when I can repurpose an item into something new. I know we have a bunch of T's around here and now I can put them to good use instead of tossing and/or buying new ones that this little guy will out grow in no time!

Don't you think this would make a great GIFT for new parents?....sneak one of daddy's old favorite T's & recreate it into a shirt the toddler can wear. You can also make little pants out of old T's as well. (have I posted that before? if not, I really should!)  I have a baby shower coming up soon...hhhmmm... ;-)

For a little girl's T, you could even flare the sleeves, which would be adorable. Don't you think? So many options--it's too easy NOT to try, isn't it? This would make a great first sewing or serging project. The toddler won't mind if you make a mistake and no one will even notice. Go ahead, try it today. I know you can do it. 


Seven Alive

Monday, October 03, 2011

BaBEE quilt

I made this quilt for a friend, on Saturday. I chose a simple, large square lay out to simplify the process and build it quickly. However, my machine began to be temperamental as soon as I changed the presser foot to the quilting foot. I could not figure out what the problem was, something with the tension. After hours of fighting with it and having to rip out all the quilted seems....I finally gave up and switched back to the regular foot and simply quilted it with a square motif and was finished quickly. Except by then, the shower was over. :-(


Her baby theme colors were black and yellow, like a bee. I love how it turned out over all. Another friend is having a surprise-gender-baby and I think this color scheme will make the perfect neutral. I plan on making another one but with more red accents. I have a good amount of fabric left over.


The back fabric is flannel. Doesn't it look like a honey comb? I did not use any batting, which makes it a great weight. Not too heavy, not too light. The 'scribbles' you see in the quilting are words; fruits of the spirit. I think I had to remove one or two permanently due to the tension issue.  I was looking at it tonight and it looks like most of them survived.

I thought the words would show up better on the honey comb side...they don't. So the front yellow pieces have bold black threaded words running through them, backwards. The momma like it though, that is all that counts.

This was also the first time I used satin binding. It was pretty easy to work with except for the fact that I ran out on a small section--which is why it is red. The red adds to it's 'modern' charm, though.

Sunday, September 25, 2011

Kindle Cover

I didn't want to buy a Kindle cover when I knew I could whip one out myself. It was pretty easy, like a pillow case for your e-reader. It did end up being a wee bit tight for it, but not unusable. Now that I have one made I know how I can make another easier and better.

It opens like a book. The Kindle can slide into the left side, like a sleeve. The right side has corner pockets to hold it in place while reading. The only thing I didn't do but would have liked, was to create something to keep it closed. I was going to attach a ribbon, but I forgot. I used some left over interfacing (I think that is what it is?) in between the fabric pieces for sturdiness.
I did look online and didn't see any I liked....especially not one with as much character as an owl with giant eyes. I fashioned it after the owl pillows I made before.
I'd like to make another...maybe not an owl but something anyway...simple but attractive.


Friday, July 29, 2011

Emerald City Barbie?

In *old* news I made these glamorous doll dresses a few months ago. I had green velvet-like fabric and this other sparkly green fabric that both had some stretch to it. I used the selvage edges so I would not need to hem edges. It's the most basic thing in the world. I cut a small strip for the top and sewed it into a tube shape.  Then I cut a larger strip for the bottom skirt portion and attached sides to create a larger tube shape.  I 'gathered' one end of the larger tube and attached it to the smaller tube, creating a 'dress'. Voila'! Easy peasy. I especially liked that there is no button, velcro or snaps to mess with because the fabric is stretchy. It slips on the dolls fairly easily and it can accommodate the sizes and shapes of a few different dolls, as indicated in the picture.

Don't they look like they are ready for a ball in the Emerald City?

Monday, June 27, 2011

Baby Shower gifts!


I attended a baby shower on Sunday afternoon for a long-time friend, she's expecting a girl after two boys. I knew I wanted to give a home made gift but I had not been on the ball @ all. I whipped together one of my owl but in miniature size. It came out adorable AND was super fast to make....it took my standard time of 'about an hour' from start to finish.  But what else?

My wheels of creativity started turning over night so that morning I whipped out a couple burp cloths in coordinating fabric, dug through my stash of crocheted items and grabbed a hat that was cute but had been too small for Birdy when I made it, found a small, cute canning jar & filled it w/ some home made detergent and put a piece of coordinating fabric over the lid. Voila'! Instant gift package. Then I wrote a blessing on my card to her. Bummed that I forgot to take a pic of the jar of detergent.

I was pleased how it all worked out! Everything looked adorable & she loved it. I dug through my stash of cloth diapers and was able to find 2 that I had purchased specifically for that purpose but never made. Then I lucked out to actually find a lid that fit the canning jar on the first try too! ;-) I already had all the supplies on hand and didn't need to spend any money.

I am also hoping to whip out a pair of crochet Mary Janes for her little bebita....because admit it, it's not every day you have the opportunity to crochet a sweet little pair of Mary Janes! ;-)

Saturday, May 14, 2011

Epic Quilt: the fine details


The story that seemed to incorporate itself into the quilt the most is A Rose for Emily. You can obviously see the dominant presence of roses within the quilt. She is a southern belle w/ a controlling father & she finally ends up w/ a 'man', whom she keeps by poisoning him w/ arsenic. His corpse is found after she dies. Of course there is more to it but that is the super nutshell version.

Here are all her elements:
the girl (she represents all the female characters from all the stories)-her "steel gray hair"
roses
the brown patch on the left w/ the carriage
the skeletal guy next to the tree
the fabrics w/ china--Emily gave china painting lessons in her home

Hills Like White Elephants: A young woman & an "American" are @ a train station discussing (or not) the trip they are taking--which I don't want to give away.....

The general color scheme of the quilt is inspired by this work. Brown & barren on one side & green/fertile on the other. (left to right) This is a significantly symbolic part of the piece's landscape.


Babylon Revisited: Story of a man after the roaring 20's who has come back to Paris to retrieve his dd, who is in the care & guardianship of his SIL--after the death of his W.

That story is most represented by the girl on the swing--he dreams of his wife on a swing PLUS the fact that he has a young dd. Also the black & the back of the quilt is black w/ outlines of stars----his SIL is dressed in black w/ a necklace of black stars.


Trifles: a short play that all takes place in a kitchen. A woman has killed her husband & the men are trying to discover WHY/motive. The women in the kitchen discover the motive but don't tell....throughout the men are putting down the "women's work".

the quilt itself because the wife had been working on a quilt
the birdcage, her friends discover a broken bird cage in her kitchen
the uneven edges--she has a spot of uneven stitches
a patch of fabric that is truffles--alluding to trifles
Also they mention that she will KNOT her quilt to quilt it--so the pink ribbons in the trees--I used to knot/quilt that portion of the quilt.
Oh & the ropes to the swing are NOOSES--because she kills her husband w/ a rope.

The Story of an Hour A woman w/ "heart trouble" learns of her DH sudden death then receives the shock of her life to discover he is still alive.

the birds in the trees--she is in her room looking out over the trees & takes note of ALL the birds in the trees.

The Open Boat : men in a dingy after their ship has sunk, they can see the shore but the waves are too rough to make it in, they keep expecting help--based on a true event of the author.

Towards the upper left is a patch w/ a light house & it says FL. The event happened off the coast of FL & during the story they can see the shore & light house but can't make it in...

The Real Inspector Hound--couldn't find the text online. I didn't like it-- a modern play that I found annoying. ;)
Up at the very top, toward the middle is a swatch of fabric of playing cards--because they play cards in the play. Plus the fact that it is a *modern* quilt.
I also sewed random squares to also emphasize the *modernity* of the piece & quilt.


The Cask of Amontillado: the narrator is so offended he kills his *frenemy* by walling him in ALIVE, deep in his families crypt.

It's very small & almost hidden, but on the right, in the crook of the tree, is a jester (square like a playing card). His friend is dressed for a costume party as a jester.
Also the pile of skulls & bones @ the base of the tree--there are bones every where in the crypt & a pile that he has moved to make the space to trap his frenemy.

Young Goodman Brown: a naive young puritan man travels into the forest to a satanic meeting & is surprised to see all the members of his village whom he considered pious & holy, including his wife.

The tree is the most significant representation of that.
But also the pink ribbons represent his wife because she had pink ribbons on her bonnet & then later he sees a pink ribbon float down from the sky & get stuck in a tree in the forest.

Cathedral: a man hosts a friend of his wife as a visitor--who happens to be blind...& ends up having his own eyes 'opened'.

Upper right corner is black & then black & white & moves into black w/ color & then into regular colors of the sky---indicative of how the main character has an enlightening experience. Also the black 'frame' of the quilt itself.

Some general items: the leaves also are mostly green on the right (your right) & are more brown on the left, to mirror the landscape of fertile & barren.


Across the bottom I made large up & down zig zag stitches, they start as green & then become brown--as grass & then dead grass.


I sewed the edges using steel gray thread. A few patches of fabric have gray or green squares sewn into them but most of the sewing was done w/ brown thread.

There are a few fabrics in the middle that have a mix of green & brown for *transition* between the two.

Far right, utmost corner there is a definitive square w/ NO fabric. That is representative of the 2 stories I did NOT intentionally include. & of the blind man in cathedral.

Up @ the top is a swatch w/ hearts on it--as most of the characters are looking for love or learn something about it etc...

The tree has all the female characters initials on it (as if they were carved) in brown fabric paint.

I think that's most everything.
Epic Quilt

For one of my classes, the professor allowed us to create a project for our final.  We had creative freedom as long as our project incorporated, in some way, the readings from the semester.  I decided to do a quilt. I was inspired by these two quilt designs: Girl on Swing & the leaves on this tree quilt.  Those quilt are mini quilts. I wanted to make mine useable size, so I went with lap/crib size. I had a class partner, he cut the tree and other elements and contributed LOTS of fabric--which I got to keep, even if we didn't use. Score!


I used new-to-me quilting techniques--applique with raw edges. All the pieces were laid ON TOP of the base fabric and sewn right on the base. 

It was A LOT more work than I anticipated & took me NUMEROUS hours of sewing. More than I ever imagined. In the end though--I felt pretty good about the over all finished piece.  I also learned a few new things about my machine LIKE I can do free motion quilting on it using a darning plate! Who knew!?!


It's hard to capture ALL the elements in this quilt on film, due to the size but you can get the general idea. Since it's finished, it will also be an entry into the fair this year! Yay! My next post will give all the secret fine details of the elements I've incorporated into this piece.

Wednesday, April 13, 2011

it wasn't pretty


Told you.
I have been meaning to take on a slip-cover project for my sofas. I bought and used canvas drop cloths from Home Depot.  I found the idea online, a decorating blog.
Wasn't too hard....


I used a ton of pins! K kept taking them out when I wasn't looking and I wouldn't realize until I began taking it off. Once I began the cushion, I actually followed a tip and basted it before I took it off. Saved me a lot of sewing heartache.  I used upholstery thread as directed.....ugh! It kept splitting and bunching up in the needle. Not sure why.
But eventually........


Tada!
I did NOT do the hem. I was too excited to wait to show you the pic though. Which isn't even very good, I know.  I took in the evening and there wasn't sufficient lighting.
If I ever take it off again, maybe I'll put a pleated box hem or something...I'm almost tempted to simply hem it by hand and leave it at that.
Anyway though...it came out better than I could have ever expected.
Even with my mistakes tweaks.


Sunday, March 27, 2011

From the vault

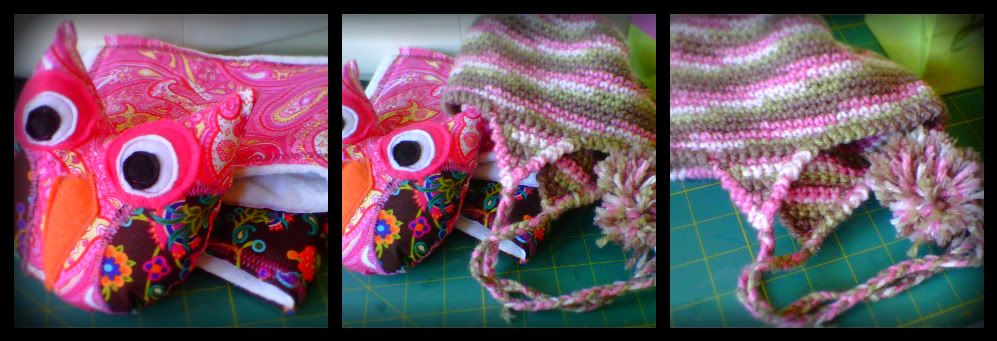
This was one of the first owl pillows I made. For a friend of the family, as a Christmas gift. If you've seen my other ones, this one has more fine details & is a bit more involved, but I must say--it sure is adorable! I've since greatly simplified my basic design. If you've read or followed my tutorial, this gives you an idea of how you can personalize your own creation.

Maybe I'll make a few specialty, sleepy ones like this..for special friends or special order. ;-)

Saturday, March 26, 2011

More Joy


A friend commissioned me to create a quilt as a gift. This one is lap/crib size.  You might recognize the blue & green printed fabrics from the quilt I made for K. She really liked those & wanted me to use them but also incorporate some pink because it is for a baby girl.


I tried something new...I 'quilted' it in a circle--actually it's a spiral--formation. I was inspired by an e-friend who did that & made it look SO EASY! Well, it might have been easy had I not done it WRONG. {does *every* project I do NEED to be a learning opportunity?} I quilted it w/ the backing/solid fabric side UP--it should have been down.  This caused all those rectangular pieces you see to sometimes 'gather' up. ugh. It all worked out in the end though.


I included a tiny bit of JOY.
{I highlighted it this time so you can actually *see* it!}
 Don't you just LOVE it?
I really do.
The JOY is in the center (somewhat) and then the quilting spirals out from there. It's not exactly *centered* but that makes it all the more unique & absolutely lovely. IMO.
I was quite tempted to keep it..... ;-)
I really love the blue Hawaiian print backing and that colorful pink print that I used for the binding.


Saturday, March 19, 2011

FREE Owl Pillow tutorial


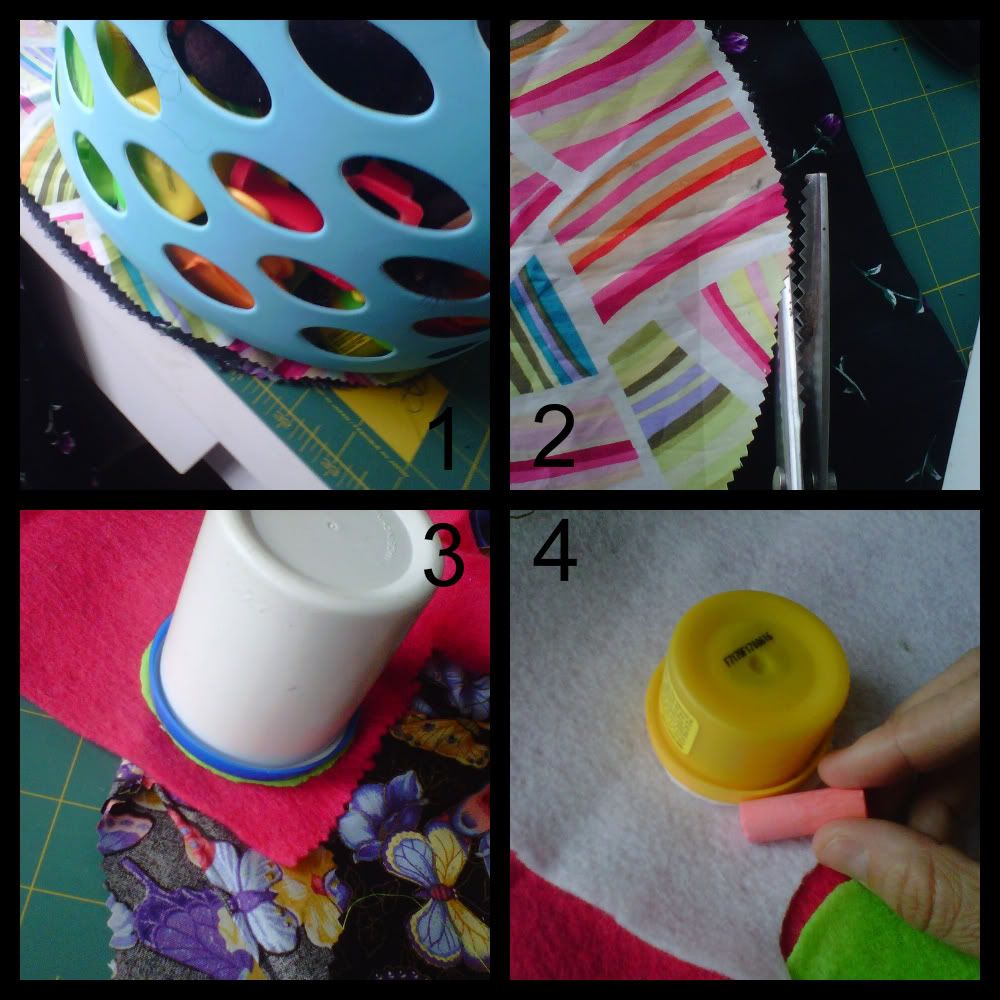
1. Decide how big you want your owl pillow to be. Find a circle shaped object you can trace. You can see I used the bottom of a basket. You can use chalk to trace around your object. Add two peaks, one on each side of the top of your circle to create the owl 'ears'.

2. Cut out your shape. It saves time to cut @ least 2 pieces @ a time. (front & back) You can also layer 4 pieces and have enough for 2 owls in the same amount of time. (I hate cutting so I look for short-cuts all the time!)

3. Again, find a smaller circle shaped household item that you can trace for the outer eye. Cut 2.

4. Find a circle slightly smaller for the white of the eye. Trace & cut 2. Do the same for the black center of the eye, or you can cut those freehand.


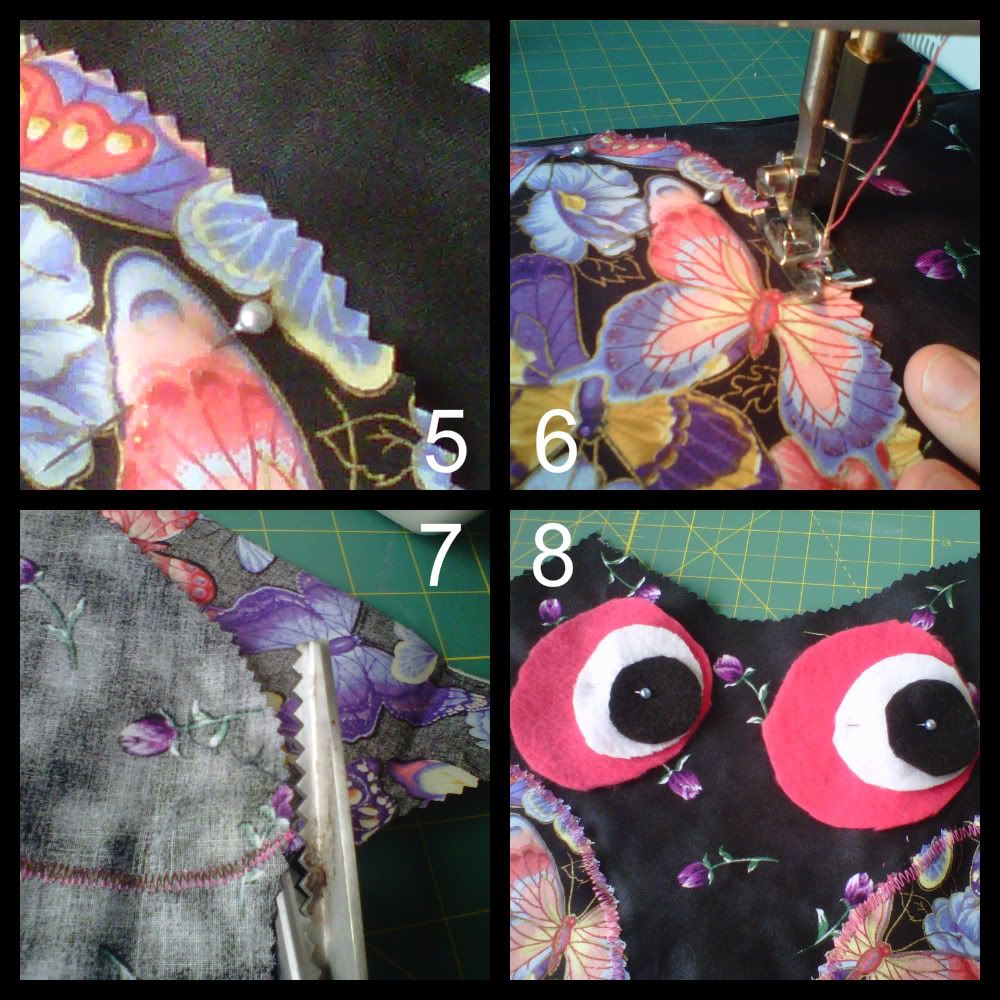
5. Cut 2 half circles or oval shapes out of coordinating fabric for 'wings'. Pin to front of owl right side facing UP.

6. Using the zig-zag stitch setting, sew wings to front of owl.  You only need to sew inside edges.  (the outside edges will be sewn later when you attach front & back)

7. Cut off any excess wing fabric to align to owl body edges.

8. Arrange eye circles as shown & pin.  You can play around with them to create different moods for your owl. (centered, looking up, looking right, looking left etc) When you are satisfied, sew eyes using straight stitch.


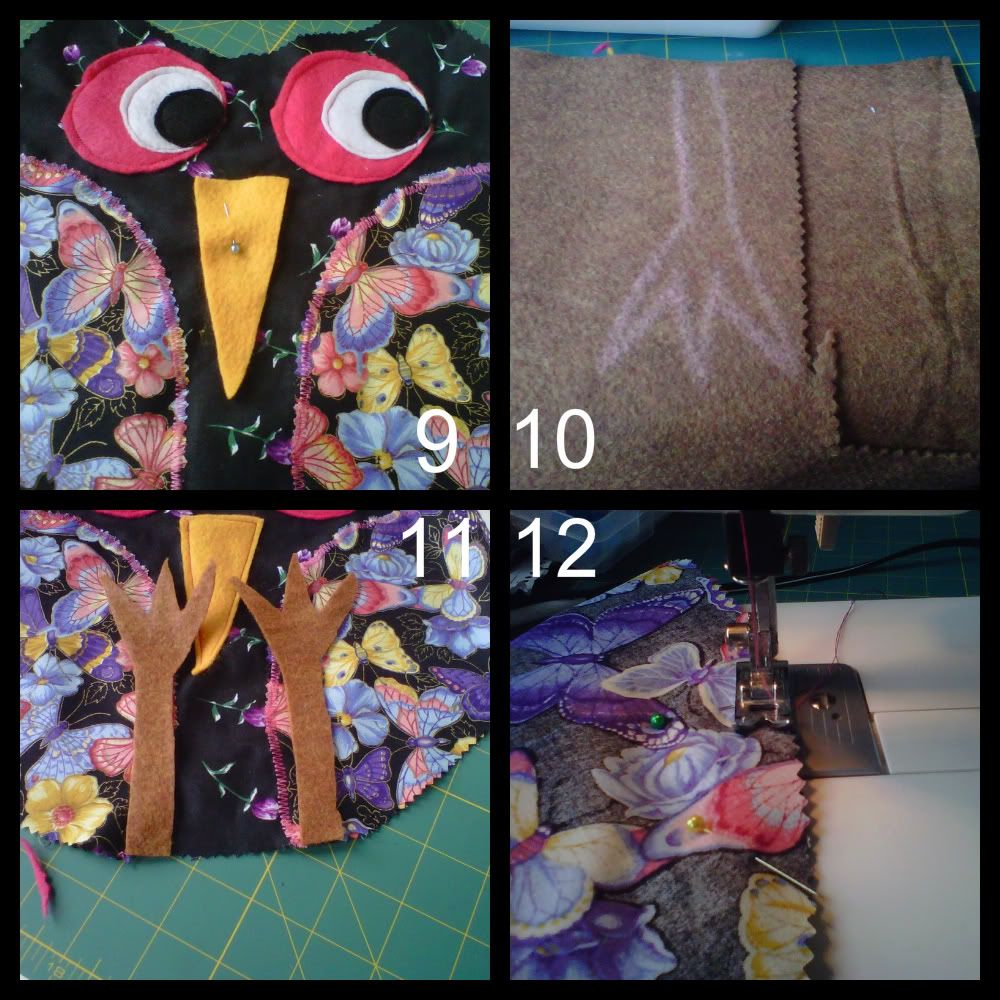
9. Cut and pin beak to front of owl, between eyes. Again, you can personalize your owl beak by making it fatter, shorter, narrower etc.

10. Draw legs (using chalk) to your preferred design. (super long & skinny, fat feet etc)

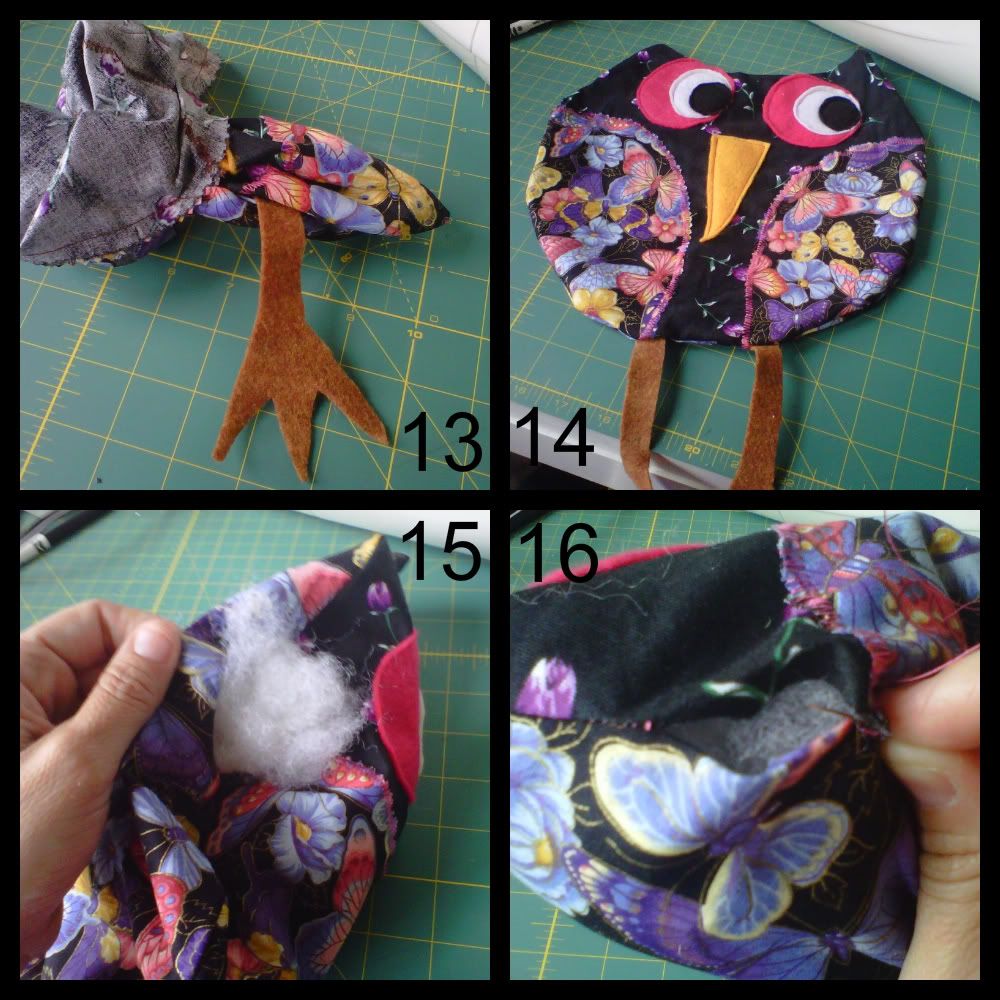
11. Attach legs, as shown, to bottom edge of owl body, upside down.

12. Place *back* of owl, right side *down*, on top of owl face.  Pin edges,sew along edges (leave seam allowance) using straight stitch. I like to back stitch over legs to reinforce. REMEMBER to leave a portion OPEN &  unsewn for stuffing.


13. Reach in through opening of body & carefully pull owl right side out.

14. Inspect your owl that all edges are properly sewn, no leg missing or open seams (besides stuffing hole) etc.

15. Begin stuffing your owl. Use plenty of stuffing and be sure to get into 'ear' peaks. A pencil or crochet hook may be useful for those spots.

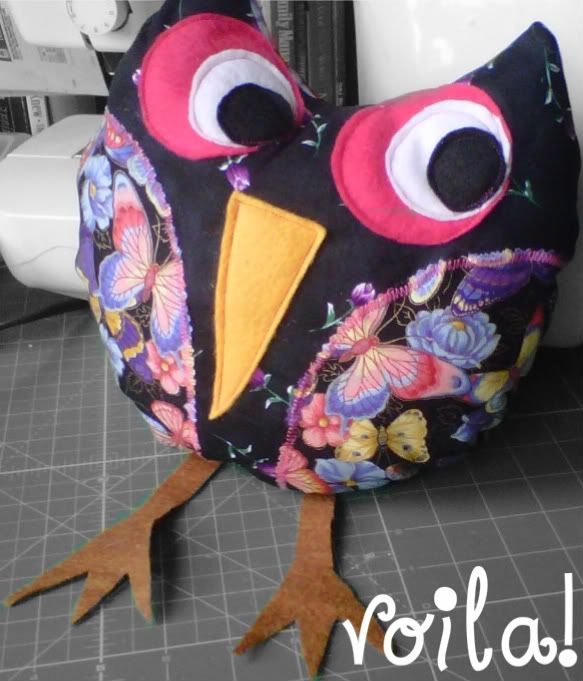
16. If you are satisfied with the shape & fullness of your owl, hand stitch closed. 


What I have shown you here, I believe is the simplest form to start with, using basic shapes. (mainly circle & triangle) *I* like to use felt for the eyes, beak and feet/legs, but feel free to experiment and have fun with it. I have also made stuffed legs and printed fabric eyes. Use your imagination and have FUN with it!

Let me know if you have any questions.
And OF COURSE, show me what you come up with.  

I'd appreciate a link back if you use this tute & find it helpful.  Feel free to create to your heart's content. ;-)