Showing posts with label owl. Show all posts

Tuesday, January 29, 2013

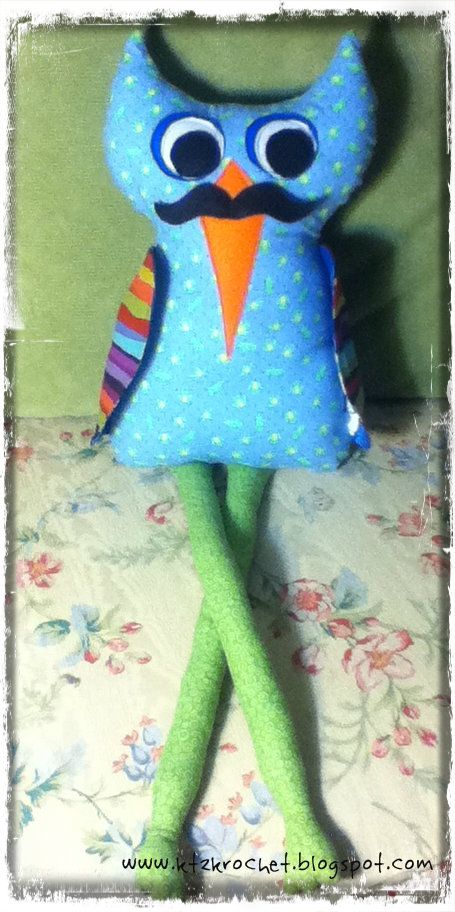
You can call me, MR. Owl

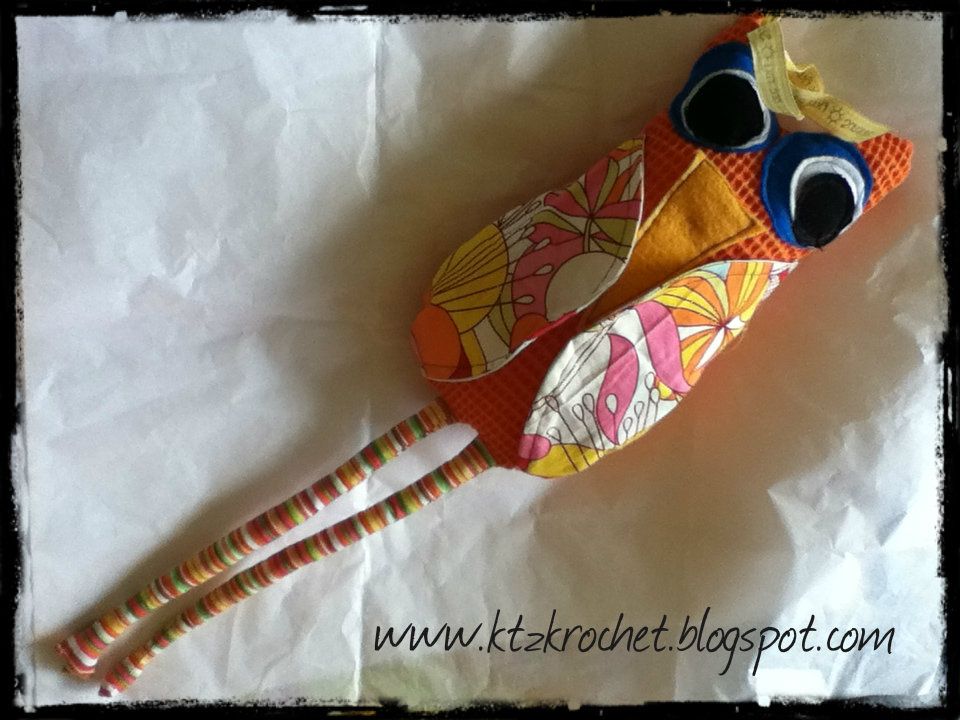
I no longer have a camera or a phone with a camera--so I am very limited to sharing my creations and recent craftiness with you. I have to bug my oldest son to snap a pic when I can. Here is a recent order I completed.

A friend placed an order for her son's birthday and this is what I came up with.


I added the mustache last minute,  on a whim and I really like it. Yep, it's trendy, but still cute. The body fabric is light blue with small green frogs. The back of the owl's body matches but has large green frogs. The inside of the wings are a different fabric too...it's the light blue with tiny darker blue polka dots, it coordinates...I think that is what fabric I used. I can't remember exactly now. 


I think this was the first owl I made with really long legs and flappy wings. There have been quite a few others between this one and Mr. Owl with the mustache...but again--NO camera. boohoo!

This one was also a birthday gift for a baby cousin. I created dollies with wings, turning them into fairies and Ms. Owl, with lovely eyelashes. each one is a totally unique, one of a kind creation. I get a color scheme from the client and then fulfill the order by mixing and matching fabric choices based on their color scheme.

I have an order cut right now that will be using red, white and blue coordinating fabrics.  She should be finished within the next few days.

Saturday, October 08, 2011

Whoooos got a Kindle?

This was the original E-reader I made. I began crocheting one before I decided to sew the one I posted about previously.

I was not happy with how it came out over all, but I do think it's really cute.

I realize some modifications I could make that would help me (or anyone) enjoy it more.

I wanted it to open so I made the wings with the ability to open. Pretty cool design but it ended up with to many 'pieces' IMO and too bulky over all. The bulkiness might be really helpful if you drop your bag or something--it would help cushion the blow.

I meant to write a pattern for it, but then I forgot.

I think I can figure it out by next week.....

This one is going to be donated toward an auction that will help support artistic, theatrical endeavors that a friend is involved in.

Sunday, September 25, 2011

Kindle Cover

I didn't want to buy a Kindle cover when I knew I could whip one out myself. It was pretty easy, like a pillow case for your e-reader. It did end up being a wee bit tight for it, but not unusable. Now that I have one made I know how I can make another easier and better.

It opens like a book. The Kindle can slide into the left side, like a sleeve. The right side has corner pockets to hold it in place while reading. The only thing I didn't do but would have liked, was to create something to keep it closed. I was going to attach a ribbon, but I forgot. I used some left over interfacing (I think that is what it is?) in between the fabric pieces for sturdiness.
I did look online and didn't see any I liked....especially not one with as much character as an owl with giant eyes. I fashioned it after the owl pillows I made before.
I'd like to make another...maybe not an owl but something anyway...simple but attractive.


Monday, June 27, 2011

Baby Shower gifts!


I attended a baby shower on Sunday afternoon for a long-time friend, she's expecting a girl after two boys. I knew I wanted to give a home made gift but I had not been on the ball @ all. I whipped together one of my owl but in miniature size. It came out adorable AND was super fast to make....it took my standard time of 'about an hour' from start to finish.  But what else?

My wheels of creativity started turning over night so that morning I whipped out a couple burp cloths in coordinating fabric, dug through my stash of crocheted items and grabbed a hat that was cute but had been too small for Birdy when I made it, found a small, cute canning jar & filled it w/ some home made detergent and put a piece of coordinating fabric over the lid. Voila'! Instant gift package. Then I wrote a blessing on my card to her. Bummed that I forgot to take a pic of the jar of detergent.

I was pleased how it all worked out! Everything looked adorable & she loved it. I dug through my stash of cloth diapers and was able to find 2 that I had purchased specifically for that purpose but never made. Then I lucked out to actually find a lid that fit the canning jar on the first try too! ;-) I already had all the supplies on hand and didn't need to spend any money.

I am also hoping to whip out a pair of crochet Mary Janes for her little bebita....because admit it, it's not every day you have the opportunity to crochet a sweet little pair of Mary Janes! ;-)

Sunday, March 27, 2011

From the vault

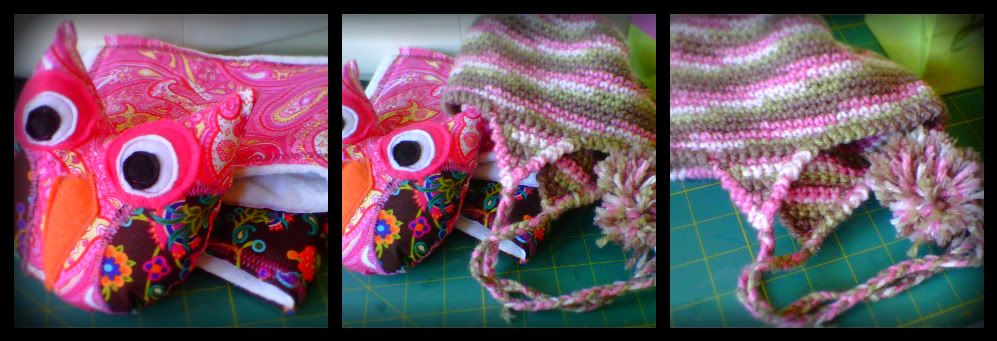
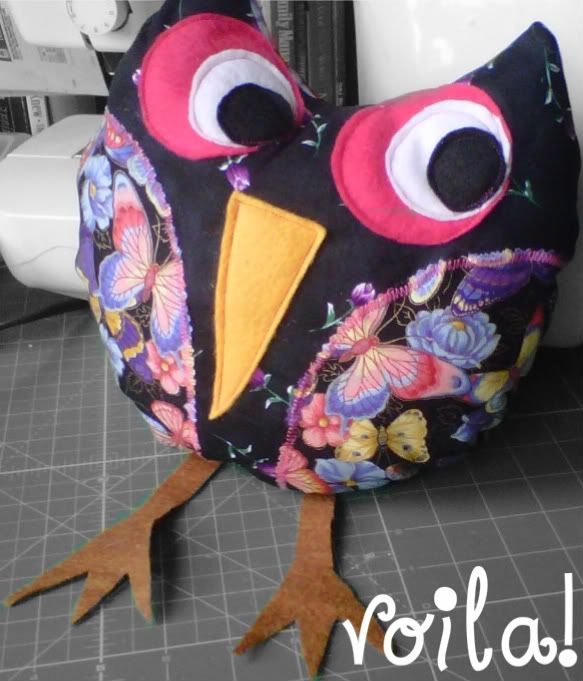
This was one of the first owl pillows I made. For a friend of the family, as a Christmas gift. If you've seen my other ones, this one has more fine details & is a bit more involved, but I must say--it sure is adorable! I've since greatly simplified my basic design. If you've read or followed my tutorial, this gives you an idea of how you can personalize your own creation.

Maybe I'll make a few specialty, sleepy ones like this..for special friends or special order. ;-)

Saturday, March 19, 2011

FREE Owl Pillow tutorial


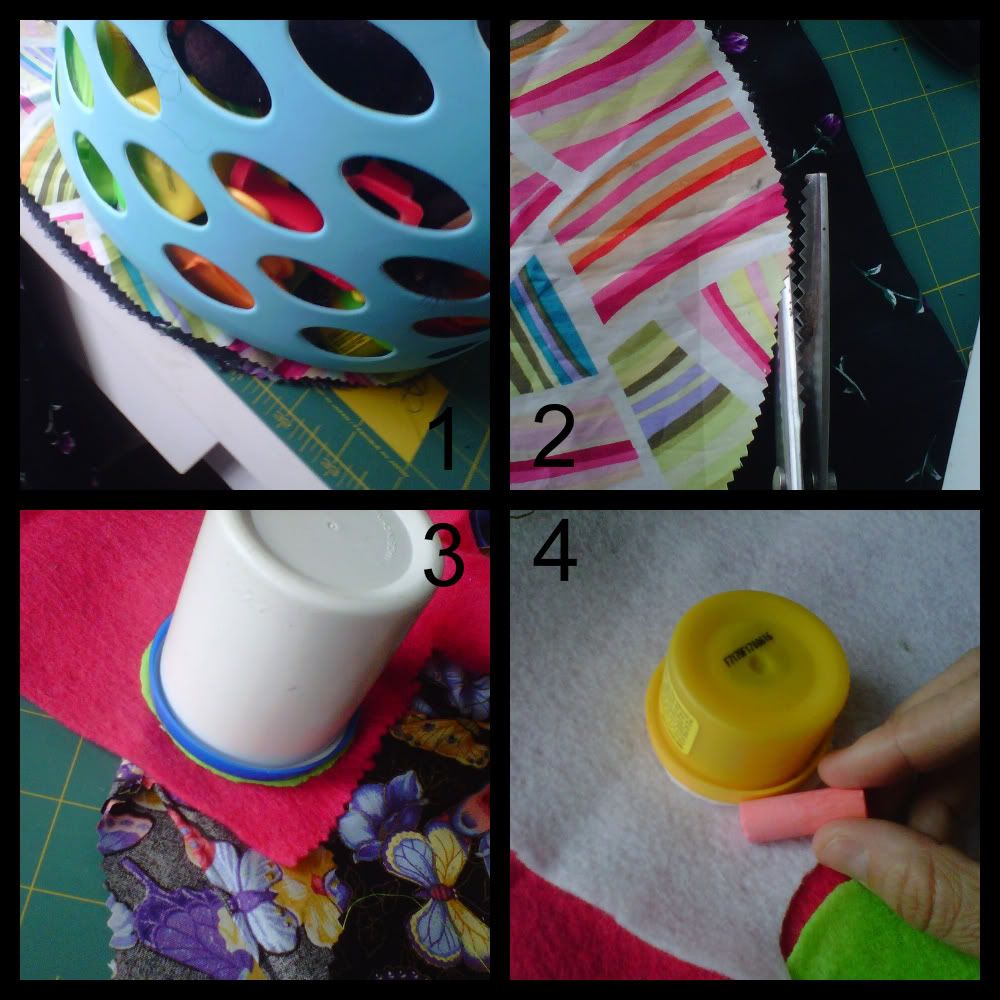
1. Decide how big you want your owl pillow to be. Find a circle shaped object you can trace. You can see I used the bottom of a basket. You can use chalk to trace around your object. Add two peaks, one on each side of the top of your circle to create the owl 'ears'.

2. Cut out your shape. It saves time to cut @ least 2 pieces @ a time. (front & back) You can also layer 4 pieces and have enough for 2 owls in the same amount of time. (I hate cutting so I look for short-cuts all the time!)

3. Again, find a smaller circle shaped household item that you can trace for the outer eye. Cut 2.

4. Find a circle slightly smaller for the white of the eye. Trace & cut 2. Do the same for the black center of the eye, or you can cut those freehand.


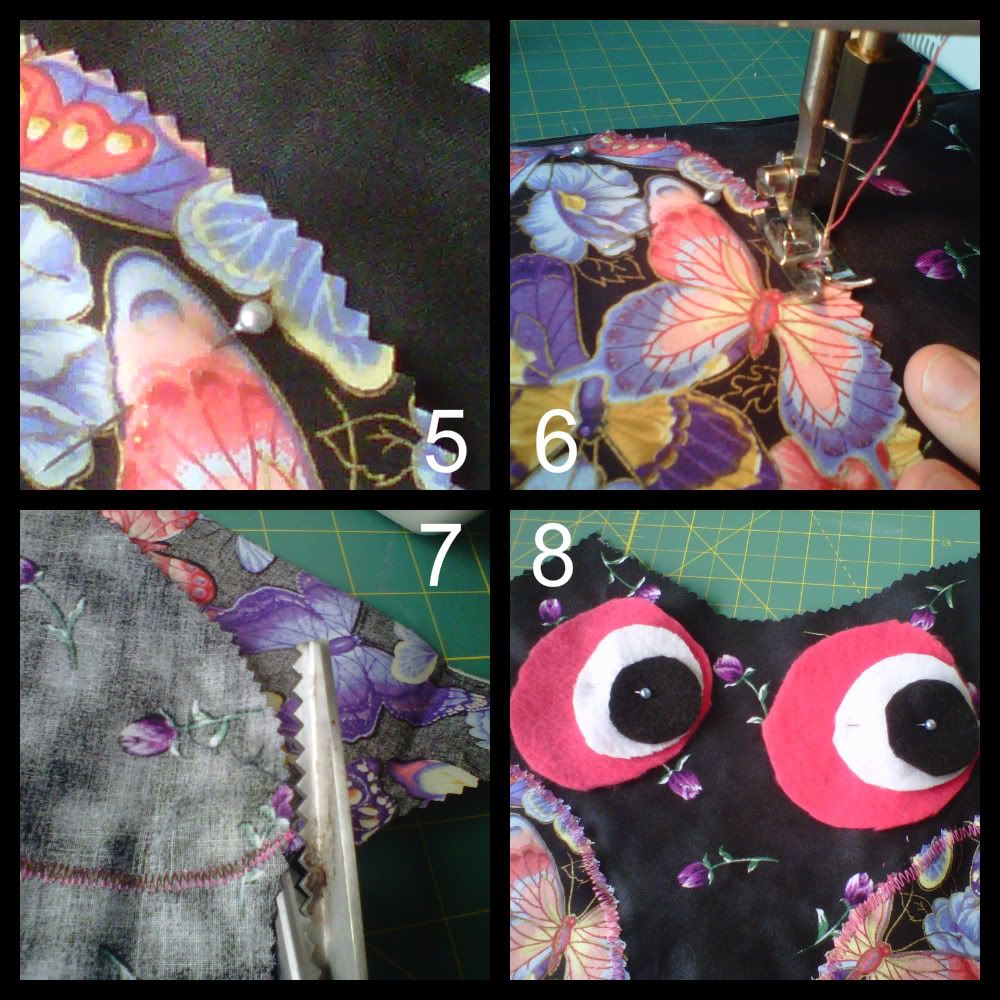
5. Cut 2 half circles or oval shapes out of coordinating fabric for 'wings'. Pin to front of owl right side facing UP.

6. Using the zig-zag stitch setting, sew wings to front of owl.  You only need to sew inside edges.  (the outside edges will be sewn later when you attach front & back)

7. Cut off any excess wing fabric to align to owl body edges.

8. Arrange eye circles as shown & pin.  You can play around with them to create different moods for your owl. (centered, looking up, looking right, looking left etc) When you are satisfied, sew eyes using straight stitch.


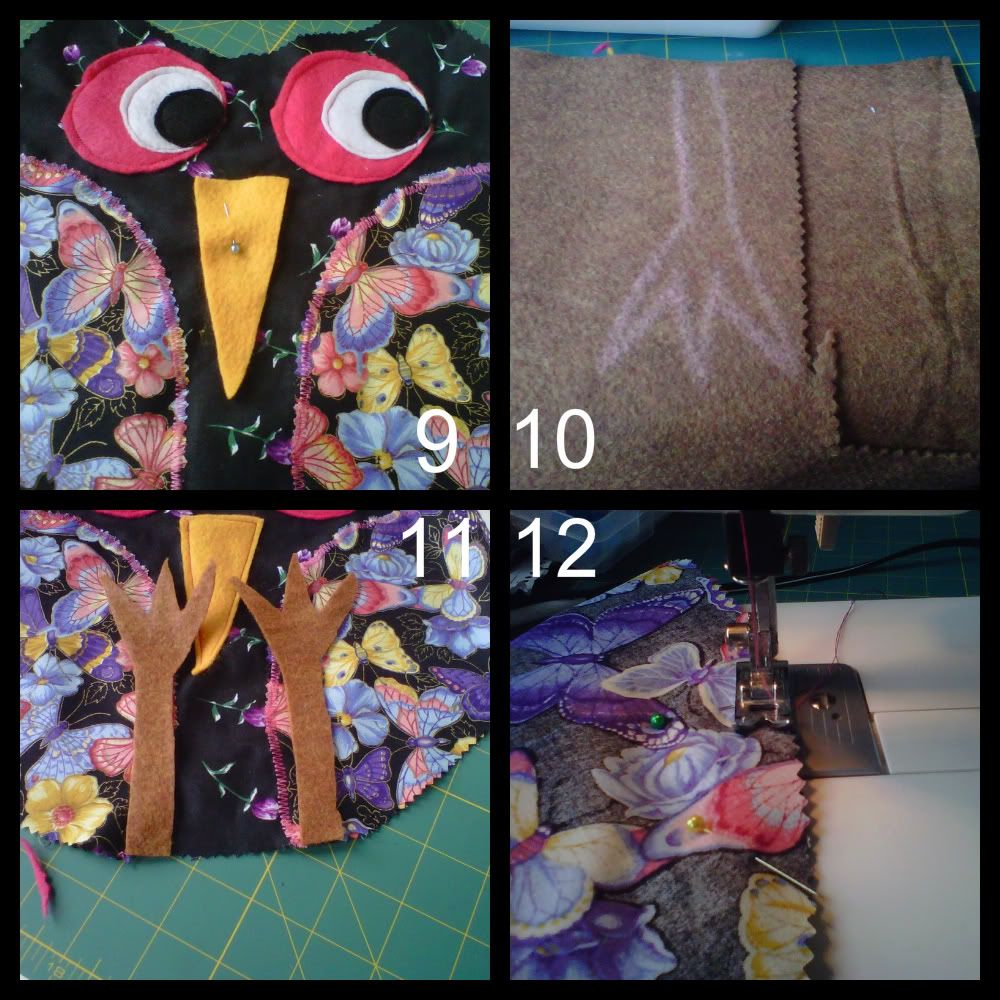
9. Cut and pin beak to front of owl, between eyes. Again, you can personalize your owl beak by making it fatter, shorter, narrower etc.

10. Draw legs (using chalk) to your preferred design. (super long & skinny, fat feet etc)

11. Attach legs, as shown, to bottom edge of owl body, upside down.

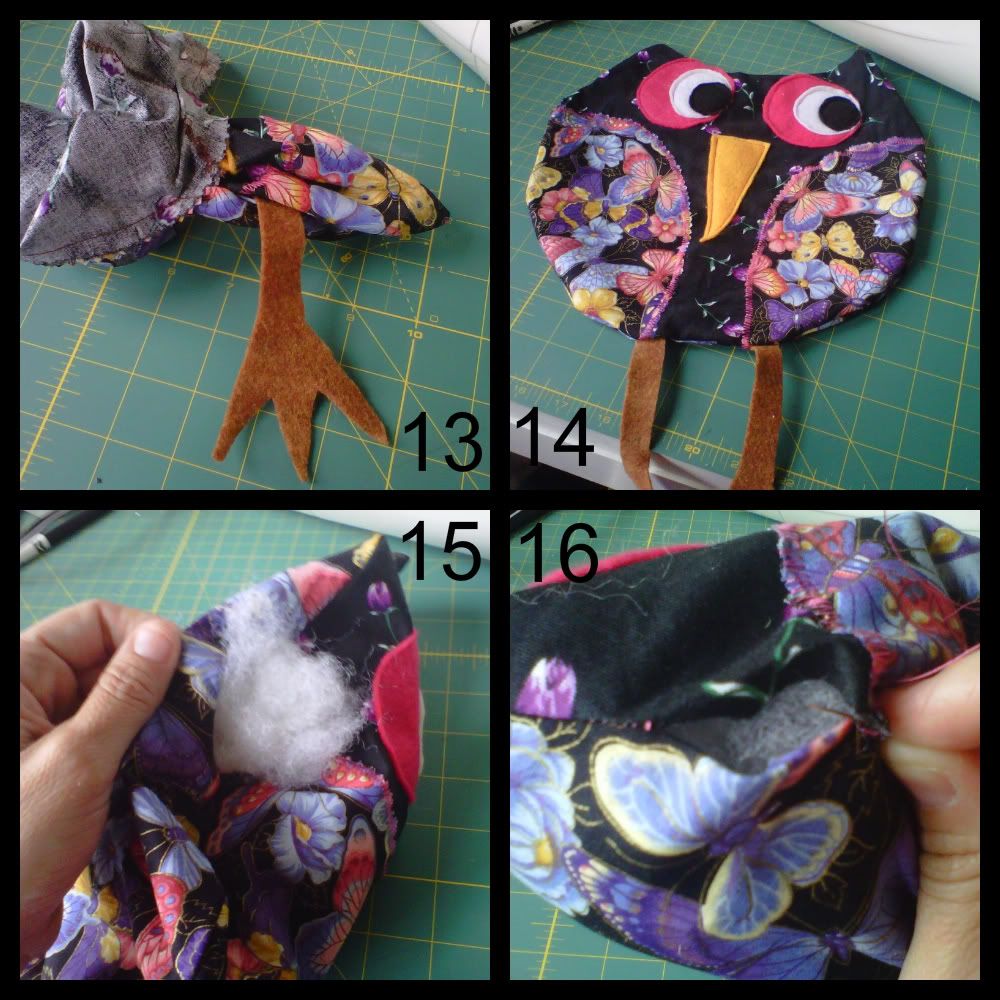
12. Place *back* of owl, right side *down*, on top of owl face.  Pin edges,sew along edges (leave seam allowance) using straight stitch. I like to back stitch over legs to reinforce. REMEMBER to leave a portion OPEN &  unsewn for stuffing.


13. Reach in through opening of body & carefully pull owl right side out.

14. Inspect your owl that all edges are properly sewn, no leg missing or open seams (besides stuffing hole) etc.

15. Begin stuffing your owl. Use plenty of stuffing and be sure to get into 'ear' peaks. A pencil or crochet hook may be useful for those spots.

16. If you are satisfied with the shape & fullness of your owl, hand stitch closed. 


What I have shown you here, I believe is the simplest form to start with, using basic shapes. (mainly circle & triangle) *I* like to use felt for the eyes, beak and feet/legs, but feel free to experiment and have fun with it. I have also made stuffed legs and printed fabric eyes. Use your imagination and have FUN with it!

Let me know if you have any questions.
And OF COURSE, show me what you come up with.  

I'd appreciate a link back if you use this tute & find it helpful.  Feel free to create to your heart's content. ;-)


Wednesday, March 16, 2011

belated Valentine gifts!


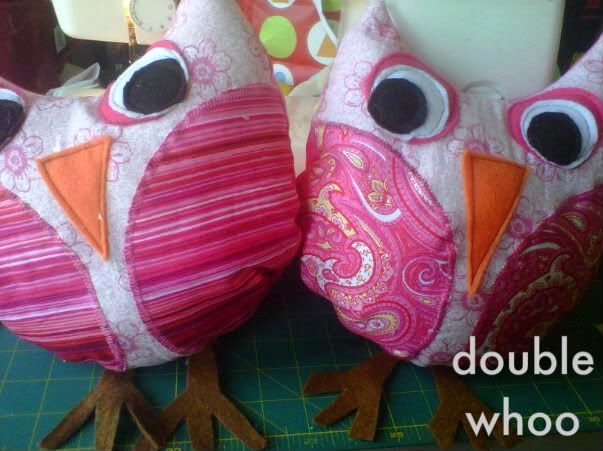
Another pair of sweet sister owls for some friends!
Seriously, aren't they just the cutest ever!!
I just LOVE making these, so simple.
I have an order for another pair--so I plan on making a tutorial for them. Although, they seem pretty self-explanatory to me, don't they?

Thursday, December 23, 2010

Whoo's the cutest?

These came out cuter than I could have ever imagined!  I whipped up quite a few as Christmas gifts for various little 'peeps' in the family. They adored them.  They were pretty simple to create.  Cutting basic shapes and using felt really sped up the process. 


I'd like to be able to create a different animal pillow using simple basic shapes.  Owls are popular right now, so I wasn't very original but it was quick and easy.
I also learned (finally) HOW to hand sew it closed with out the stitching looking like FRANKENSTEIN! Finally. LOL
The seams looked great--since they were perfectly invisible.